0 Comments
  •   Posted in: 
  • UWP

UWP.MDI is a library for building MDI applications in UWP. In the introduction post I mentioned that UWP.MDI has two goals:

  1. To provide comprehensive MDI support for UWP applications.
  2. To provide MDI support in such a way that those familiar with Windows Forms' MDI support feel at home.

One goal was missing from that list: Making UWP the best platform for building MDI applications. That means that when using UWP.MDI, we should be able to reap the benefits which UWP has over Windows Forms: XAML, data binding and the MVVM paradigm.

MVVM and UWP.MDI

To see how UWP.MDI and MVVM play together, there’s now a new sample in the repo: https://github.com/mikoskinen/UWP.MDI/tree/master/samples/UWP.MDI.MVVM

The sample doesn’t use any MVVM framework to make it clean. It contains a ViewModelLocator which is used to hook forms and view models together but other than that, it’s straight forward.

The sample contains the Main page (MDI Container) and two forms (Customers, Invoices). Each of these has a corresponding view model. For example here’s the CustomerViewModel which is bind against the form:

        public CustomerViewModel()
        {
            var customers = new ObservableCollection<Customer>();

            var names = new List<Tuple<string, string>>
            {
                Tuple.Create("Noel", "Hess"),
                Tuple.Create("Silver", "Holland"),
                Tuple.Create("Rudy", "Phillips"),
                Tuple.Create("Skylar", "Cabrera"),
                Tuple.Create("Blair", "Kirby"),
            };

            for (int i = 0; i < names.Count; i++)
            {
                var id = i + 1;
                var name = names[i];
                var customer = new Customer(id, name.Item1, name.Item2);
                customers.Add(customer);
            }

            Customers = customers;
        }

        public event PropertyChangedEventHandler PropertyChanged;

        protected virtual void OnPropertyChanged([CallerMemberName] string propertyName = null)
        {
            PropertyChanged?.Invoke(this, new PropertyChangedEventArgs(propertyName));
        }
    }

The form itself hooks up with the view model through the ViewModelLocator:

<UserControl
    x:Class="UWP.MDI.Samples.MVVM.Customers.CustomerForm"
    xmlns="http://schemas.microsoft.com/winfx/2006/xaml/presentation"
    xmlns:x="http://schemas.microsoft.com/winfx/2006/xaml"
    xmlns:d="http://schemas.microsoft.com/expression/blend/2008"
    xmlns:mc="http://schemas.openxmlformats.org/markup-compatibility/2006"
    xmlns:grid="using:Telerik.UI.Xaml.Controls.Grid"
    xmlns:controls="using:UWP.MDI.Controls"
    mc:Ignorable="d"
    d:DesignHeight="300"
    d:DesignWidth="400"
    Width="450"
    Height="400" controls:FormProperties.Text="Customers" DataContext="{Binding CustomerViewModel, Source={StaticResource ViewModelLocator}}">

    <Grid>

        <Grid>
            <grid:RadDataGrid x:Name="DataGrid" ItemsSource="{Binding Customers}"/>
        </Grid>
    </Grid>
</UserControl>

We use commands to display the forms through the MainPageViewModel:

    public class MainPageViewModel
    {
        public ICommand ShowCustomersCommand { get; set; }
        public ICommand ShowInvoicesCommand { get; set; }
        public ICommand ExitCommand { get; set; }

        public MainPageViewModel()
        {
            ShowCustomersCommand = new RelayCommand(() =>
            {
                var frm = new Customers.CustomerForm();
                frm.Show();
            });

            ShowInvoicesCommand = new RelayCommand(() =>
            {
                var frm = new Invoices.InvoiceForm();
                frm.Show();
            });

            ExitCommand = new RelayCommand(() =>
            {
                Application.Current.Exit();
            });
        }
    }

All in all, straight forward code if you’re familiar with MVVM.

Coming soon

A sample which uses Caliburn.Micro is coming soon. Caliburn.Micro is a full blown MVVM framework and creating a sample for it is a good way to make sure that UWP.MDI has the required extensions points to make it work correctly with all the MVVM frameworks out there.
0 Comments

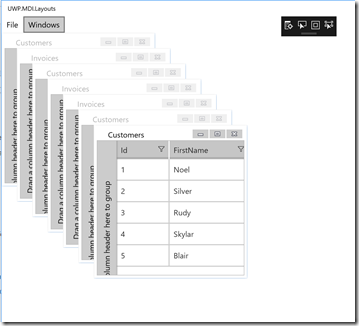
imageLast week I introduced UWP.MDI, a new library for building MDI applications in UWP.

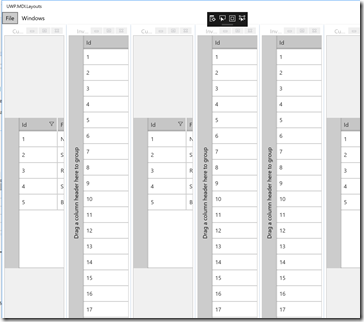
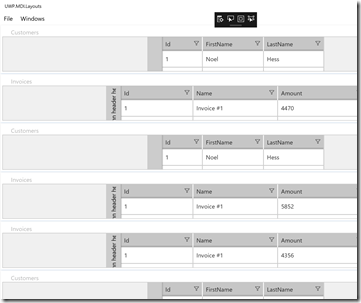
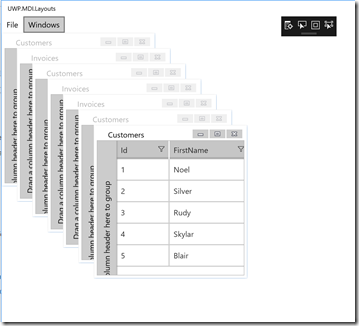
The open source library has been updated this week to support automatic arrangement of child windows. The library now contains three built-in layouts:

Cascade

image

Tile vertical

image

Tile horizontal

image

Usage

To apply layout, call MDIContainer.LayoutMdi(desired layout). Built-in layouts are available from LayoutMdi:

        private void CascadeMenuItem_OnClick(object sender, RoutedEventArgs e)
        {
            Mdi.LayoutMdi(MdiLayout.Cascade);
        }

        private void TileVerticalMenuItem_OnClick(object sender, RoutedEventArgs e)
        {
            Mdi.LayoutMdi(MdiLayout.TileVertical);
        }

        private void TileHorizontalMenuItem_OnClick(object sender, RoutedEventArgs e)
        {
            Mdi.LayoutMdi(MdiLayout.TileHorizontal);
        }

Custom layouts

You can implement custom MDI layouts by inheriting abstract class MdiLayout and implementing the RunLayout-method.

Good starting point for an example is Cascade layout.

Note

Layouts are not continuous. Meaning, they only arrange windows when run, after which user can again move and resize windows as they desire.

Sample

Repository contains a new “samples”-folder which currently includes two samples: Getting started and Layouts. You can check out the layouts-sample for more concrete guidance.

NuGet

The layout support isn’t included in the current 1.0.0.1 package but it will be included in version 1.1.0.0, which is coming out later this week.

You can get the latest bits from GitHub and start working with the feature.

0 Comments

UWP.MDI_faster

UWP.MDI is a new library which provides MDI (Multiple document interface) support for UWP applications. The library is completely open source and available with MIT license.

Background

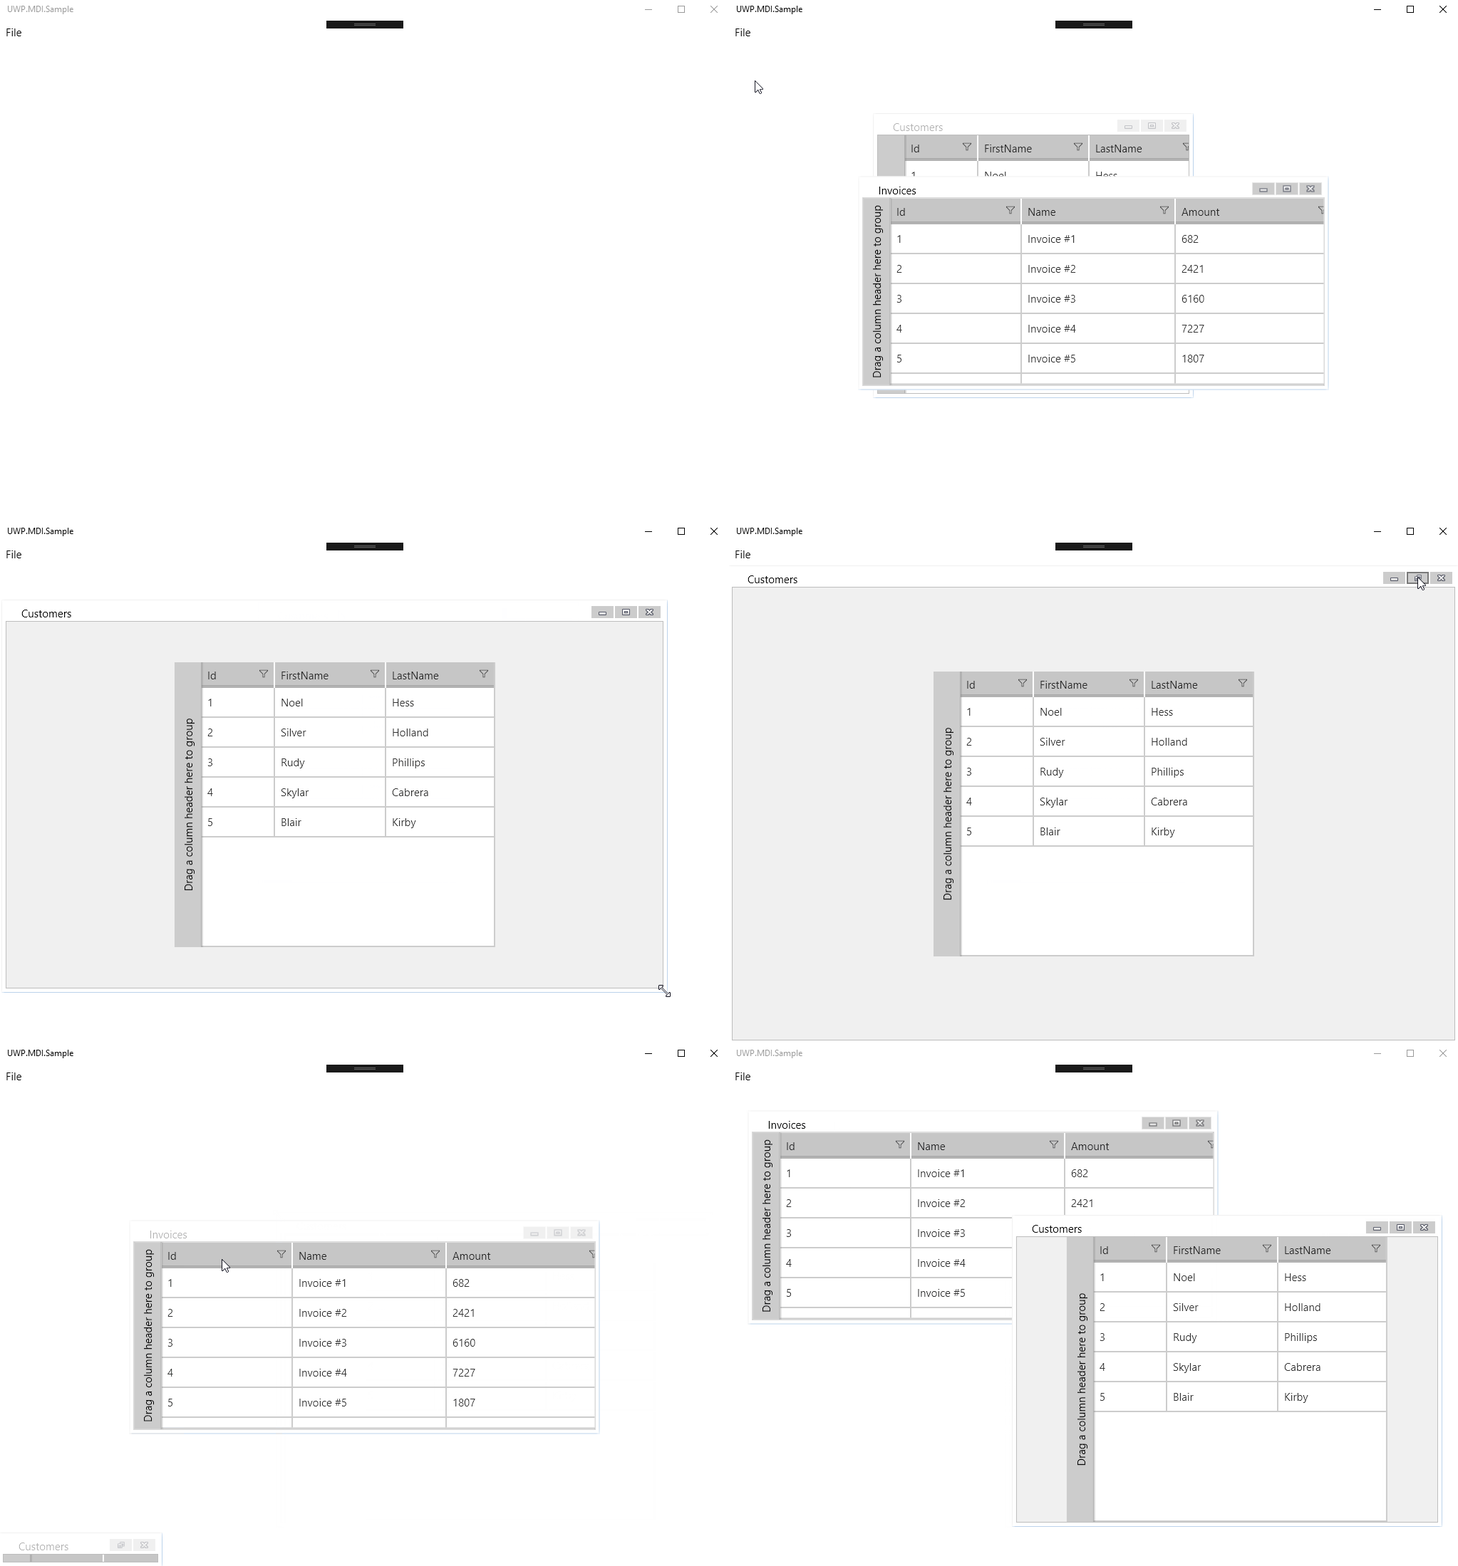
MDI (Multiple Document Interface) was popular user interface paradigm in Windows Forms era. MDI allows one window to host multiple child windows. Each window can be resized and moved around.

When WPF was released, it didn't contain support for MDI interfaces and the situation didn't change when WinRT and UWP were released.

UWP.MDI has two targets:

  1. To provide comprehensive MDI support for UWP applications.
  2. To provide MDI support in such a way that those familiar with Windows Forms' MDI support feel at home.

Getting started

Getting started with UWP.MDI aims to be simple:

  1. Create a blank uwp application
  2. Add MDIContainer into the MainForm
  3. Add UserControl
  4. Show UserControl by creating a new instance of it and calling MyUserControl.Show()

The easiest way to get learn more is to clone the project repository (https://github.com/mikoskinen/UWP.MDI) and to launch the sample application. The sample contains the MDI container and couple child windows.

Known issues

The library has few known issues. Main thing is making sure that everything works nicely with your MVVM framework of choice. The UWP.MDI library is implemented in such a way that you can continue using for example Caliburn.Micro, but there’s currently no available sample for that.

Links

UWP.MDI is available from GitHub: https://github.com/mikoskinen/UWP.MDI

0 Comments
  •   Posted in: 
  • UWP
SOAP Web Services might not be the most popular Web Api technology at the moment but many companies still rely on them. Here's a short tutorial on how to call SOAP Web Service from UWP app.

Connect to service

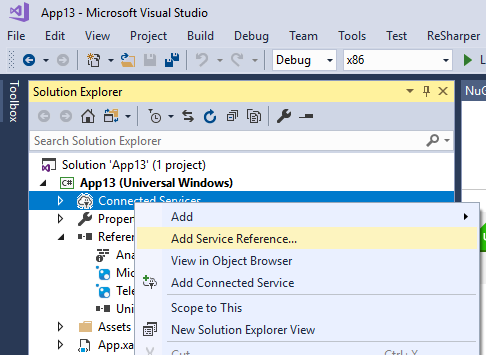
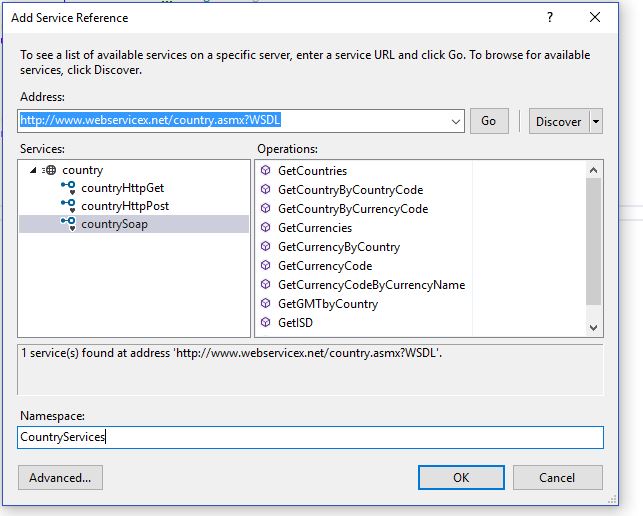
To connect to SOAP service, you can use Visual Studio's "Connected Services" - "Add Service Reference" context menu:

In the "Add Service Reference" enter the URL to the WSDL and select Go.

Select your service, give a namespace and hit OK.

Call service

Now your SOAP client is available from the namespace you provided in the previous screen. "Add service reference" creates a proxy class, which can be used to call any operations provided by the service. Create new instance of the call and run its methods to call the operations.

Note: All the operation calls are async.

0 Comments
  •   Posted in: 
  • UWP

9f487017-1cc8-4ab2-88ec-eca71fab35c2[4]

In our last tutorial we created an UWP widget dashboard app (and platform) using Caliburn.Micro. The platform in its first version is very basic and we ended up listing many improvements to it:

  • Instead of always having all the widgets, user should be able to add and remove widgets.
  • Common widget elements, like title and action buttons.
  • Different sized widgets instead of a single fixed size.
  • Ability to send notifications from a widget to a widget using Event aggregator.
  • Ability to send notifications from a widget to the shell using Event aggregator.

In this tutorial we’re going to show how it’s possible to do widget to widget communication.

Background

We want our widgets to be self contained and isolated, meaning we don’t want them to interfere with the other widgets and we don’t want our shell to have to care about which widgets it is hosting.

Widgets can communicate with each directly and indirectly. Direct way (calling a method from another widget) introduces coupling and makes it harder to keep widgets isolated. Preferred way is to use indirect messaging.

Direct communication

It’s possible to communicate directly from a widget to an another but this isn’t recommended.If you really need to do this, a widget can reference other widgets through its Parent-property (which is provided by Caliburn.Micro). The following code shows how you can directly call methods from other hosted widgets:

            var widgets = ((ShellViewModel) this.Parent).Items;
            foreach (var widget in widgets)
            {
                if (widget is CustomerListViewModel customerList)
                {
                    customerList.AddNewCustomer(FirstName, LastName);
                }
            }

But as mentioned, you shouldn’t do this in most cases.

Indirect communication using the Event Aggregator

Caliburn.Micro contains an event aggregator. Event aggregator is a “middle man” which you can use to handle widget-to-widget, widget-to-shell and shell-to-widget communication.

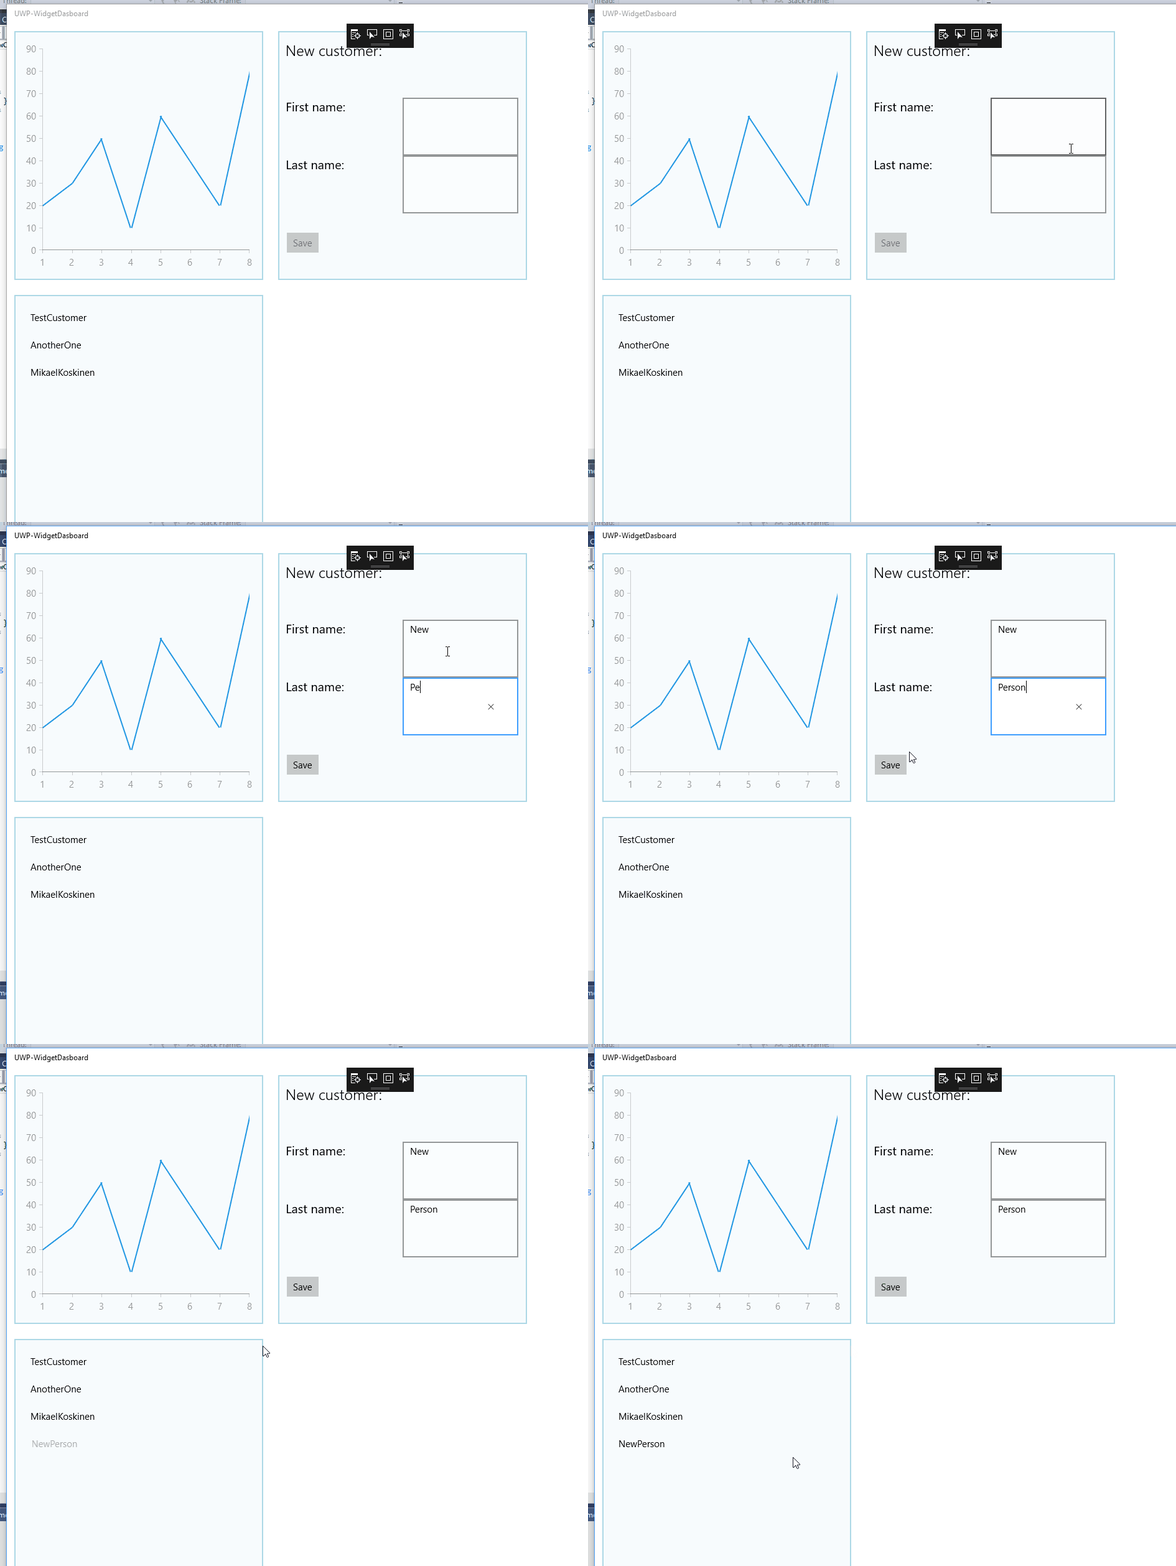
With event aggregator your widgets (and shell) can raise messages. Any other widget can subscribe to the messages they are interested in. For example “NewCustomerWidget” can raise “NewCustomerAdded” message. “CustomerListWidget” can listen (to subscribe) to this message and react to it, by for example refreshing its view.

Given that we have NewCustomerWidget, it can can raise desired message using IEventAggregator.Publish(). First we need to define the message:

    public class NewCustomerCreated
    {
        public string FirstName { get;  }
        public string LastName { get; }

        public NewCustomerCreated(string firstName, string lastName)
        {
            FirstName = firstName;
            LastName = lastName;
        }
    }

Then we can raise (publish) the message from our widget:

    public class NewCustomerViewModel : Screen, IWidget
    {
        private string _lastName;
        private string _firstName;
        private readonly IEventAggregator _eventAggregator;

        public string FirstName
        {
            get { return _firstName; }
            set
            {
                _firstName = value;
                NotifyOfPropertyChange(() => FirstName);
                NotifyOfPropertyChange(() => CanSave);
            }
        }

        public string LastName  
        {
            get { return _lastName; }
            set
            {
                _lastName = value;
                NotifyOfPropertyChange(() => LastName);
                NotifyOfPropertyChange(() => CanSave);
            }
        }

        public bool CanSave
        {
            get
            {
                if (string.IsNullOrWhiteSpace(FirstName))
                    return false;
                if (string.IsNullOrWhiteSpace(LastName))
                    return false;

                return true;
            }
        }

        public NewCustomerViewModel(IEventAggregator eventAggregator)
        {
            this._eventAggregator = eventAggregator;
        }

        public void Save()
        {
            this._eventAggregator.PublishOnUIThread(new NewCustomerCreated(FirstName, LastName));
        }
    }

Main things to notice:

  • IEventAggregator is passed through constructor.
  • Message is raised using PublishOnUiThread.

Now that our widget can publish messages, we can add subscribers who can react to these messages. Here’s how we can make our “CustomerListWidget” to update its view anytime new customer is added:

    public class CustomerListViewModel : Conductor<Customer>.Collection.AllActive, IWidget, IHandle<NewCustomerCreated>
    {
        public CustomerListViewModel(IEventAggregator eventAggregator)
        {
            eventAggregator.Subscribe(this);

            this.Items.Add(new Customer("Test", "Customer"));
            this.Items.Add(new Customer("Another", "One"));
            this.Items.Add(new Customer("Mikael", "Koskinen"));
        }

        public void Handle(NewCustomerCreated message)
        {
            this.Items.Add(new Customer(message.FirstName, message.LastName));
        }
    }

Main things to notice:

  • IEventAggregator is passed through constructor and we subscribe our view model to it.
  • Our view model implements IHandle<NewCustomerCreated>

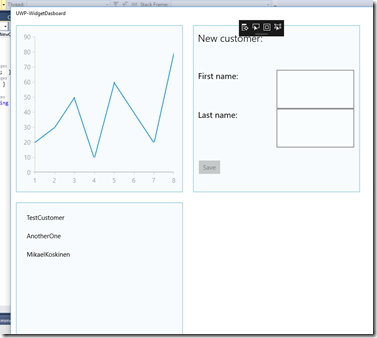
When we now run the app, we can see our two customer related widgets:

image

If we now create a new customer, we can see that the customer list is updated:

9f487017-1cc8-4ab2-88ec-eca71fab35c2

Conclusion

You can use direct widget-to-widget communication but instead you should prefer indirect messaging. Event aggregator makes it possible for widgets to publish and subscribe to messages.

The source code for this tutorial is available through GitHub.