0 Comments

This post shows how to use Azure Service Bus Topics and filters to handle a scenario where events and event handers aren’t known when starting the system.

Background

One of our systems can contain 0 or 10 different event types. And it can contain 0 or 100 event handlers. The idea is that the event handlers can be added dynamically runtime. And to make things even more interesting, also the events can be added runtime. One event can have zero-n event handlers.

We use Azure Service Bus topics for the pub&sub model of communication.

The problem

The problem is that if we don’t know the types of events when starting the system, how can we easily create the required topics?

The solution

The solution was to only use one pre-defined topic and then to filter the communications using Azure Service Bus subscription filters.

More details

As the events and event handlers can change dynamically when the system is running, pre-creating all the Service Bus topics is cumbersome and not actually possible. To get around this there’s couple options:

  1. The event creator and event handler both try to create the Service Bus Topic if it doesn’t exists.
  2. All the event creators and handlers use the same pre-created topic and use message properties and subscription filters to handle only the relevant messages.

We ended up using the second option. So there’s only one topic (system-events) and all the event creators push their messages into the same topic.

When pushing the event, the event creator adds a property to message which defined the message’s type. For example newinvoice.

All the event handlers then subscribe to the same system-eventstopic. But when creating the subscription, they attach a filter to the subscription, indicating what types of messages they are interested in.

How to use the topic filters in C#

The official Azure GitHub contains a good sample of using Service Bus topic filters in C#.

Main thing is to specify the filter on event handler when creating the subscription:

  await namespaceManager.CreateSubscriptionAsync(
        "system-events",
        "newinvoicesubs"
        new SqlFilter("eventtype = 'newinvoice'));

Other thing to remember is to define the event type when pushing to the topic:

var message = new BrokeredMessage();
message.Properties = {{ "eventtype", "newinvoice" }};
await topicClient.SendAsync(message);
0 Comments

In this post we will use NetMQ to build a solution where multiple clients can run commands on the server and the server dynamically created a worker for each command.

Background

ZeroMQ and its .NET port NetMQ are interesting technologies. They seem to have a rather smallish but very enthusiastic group of users and the “scene” gives similar vibes as the Redis community.

ZeroMQ is a technology for adding distributed messaging into your system. Pub & sub, reply & request and other types of communication patterns are available. ZeroMQ doesn’t require a server installation, so it’s a library instead of full blown server solution. For communication, you can use TCP, inproc and other techniques.

Dynamic workers

We needed to use NetMQ in a situation where there’s multiple clients running commands on the server. The idea was that the server would spin up a worker for each client request. Even though ZeroMQ’s documentation is good, finding an example with dynamic workers turned out cumbersome.

We ended up using the following topology:

Client: RequestSocket

Server: RouterSocket (TCP 5555) – DealerSocket (TCP 5556) & Poller

Worker: DealerSocket

Creating the server

The server has a frontend for the requests coming from the client. It also has the backend for communicating with the workers. Poller is used to handle the messages:

Console.WriteLine("Starting server");
using (var front = new RouterSocket())
using (var back = new DealerSocket())
{
    front.Bind("tcp://localhost:5555");
    back.Bind("tcp://localhost:5556");

    var poller = new NetMQPoller();
    poller.Add(front);
    poller.Add(back);

	front.ReceiveReady += (sender, eventArgs) => {...};
	back.ReceiveReady += (sender, eventArgs) => {...};

	poller.Run();
}

Creating the workers

When the server’s frontend receives a message, we want to spin up a new worker. In this example we use ThreadPool to create the worker:

front.ReceiveReady += (sender, eventArgs) =>
{
    var mqMessage = eventArgs.Socket.ReceiveMultipartMessage(3);

    var id = mqMessage.First;
    var content = mqMessage[2].ConvertToString();

    Console.WriteLine("Front received " + content);

    ThreadPool.QueueUserWorkItem(context =>
    {
		// The worker
		// Parameters are available from the context.
        var context = (Tuple<NetMQFrame, string>) context;

        var clientId = context.Item1;
        var message = context.Item2;

		// Run the command
        Thread.Sleep(TimeSpan.FromSeconds(3));

		// Send message to server's backend which then will return the reply to the client
        using (var workerConnection = new DealerSocket())
        {
            workerConnection.Connect("tcp://localhost:5556");

            var messageToClient = new NetMQMessage();
            messageToClient.Append(clientId);
            messageToClient.AppendEmptyFrame();
            messageToClient.Append("hello from worker");

            workerConnection.SendMultipartMessage(messageToClient);
        }

    }, Tuple.Create(id, content));
};

Returning the message to client

As we can see from the code above, the worker message sends the reply to the server’s backend. Only thing left is to route the reply back to the client:

                    back.ReceiveReady += (sender, eventArgs) =>
                    {
                        Console.WriteLine("Back received message, route to client");
                        var mqMessage = eventArgs.Socket.ReceiveMultipartMessage();
                        front.SendMultipartMessage(mqMessage);
                    };

The client

Our client uses RequestSocket to call the server’s frontend. We use a blocking call, so we wait for the server (the worker) to reply:

using (var client = new RequestSocket())
{
    client.Connect("tcp://localhost:5555");
    client.SendFrame("hello from client");
    var returned = client.ReceiveFrameString();
    Console.WriteLine(i1.ToString() + ": back at client " + returned);
}

Conclusion

This post shows one solution for spinning up worker tasks (threads) dynamically using NetMQ. Even though NetMQ only includes few basic concepts, the concepts are so flexible that it’s quite that there’s many other ways to handle this situation.

0 Comments

We’ve been creating a system where we need to download and use NuGet packages dynamically, runtime. To handle this, we use NuGet.Core.

Using NuGet.Core

NuGet.Core contains the basic functionality for installing, removing and updating packages. The main classes when dealing with NuGet.Core are PackageRepositoryFactoryand PackageManager. PackageRepositoryFactory creates the “connection” into your NuGet repository and PackageManager is used to install the packages. Here’s an example code which covers the following situation:

  • We have a console app
  • We use local NuGet repository (file system)
            var repo = PackageRepositoryFactory.Default.CreateRepository("file://C:/temp/packages");
            var packageManager = new PackageManager(repo, _installLocation);
			
            var package = repo.FindPackage("mypackage", SemanticVersion.Parse("1.0.0.0"));
			
			packageManager.PackageInstalled += (sender, eventArgs) =>
            {
                var fileRoot = System.IO.Path.GetDirectoryName(Path.Combine(eventArgs.InstallPath, eventArgs.Package.AssemblyReferences.First().Path));
                Console.WriteLine(fileRoot);
            };
			
			packageManager.InstallPackage(package, false, true, true);

PackageManager’s even PackageInstalled usually causes some grief because it is raised only when package is actually installed: If it’s already installed, PackageInstalled-event is skipped.

Using classes from NuGet runtime

We use MEF to actually execute the code inside the NuGet packages:

  1. Make sure that the packages contains classes which implement known interfaces.
  2. Use DirectoryCatalog to initialize the MEF container.
  3. Use GetExportedValues to get the implementing classes.

For example:

packageManager.PackageInstalled += (sender, eventArgs) =>
{
    var fileRoot = System.IO.Path.GetDirectoryName(Path.Combine(eventArgs.InstallPath, eventArgs.Package.AssemblyReferences.First().Path));

    if (fileRoot == null)
        return;

    var catalog = new AggregateCatalog(
        new DirectoryCatalog(fileRoot, "*.dll"));

    var container = new CompositionContainer(catalog);

    var activities = container.GetExportedValues<IActivity>();
    foreach (var activity in activities)
    {
		activity.Run();
    }
};

0 Comments
  •   Posted in: 
  • UWP

imageUWP apps support multiple views/windows. Compared to Windows Forms and WPF apps there’s one big difference in UWP: All application views use different threads. This makes it harder to build applications where different views communicate with each other.

In this post we explore couple different ways of multi-window communication.

Creating a new View (Window) in UWP

To create a new view in UWP app one can use CoreApplication.CreateNewView. Here’s the basic code for opening an another view:

            CoreApplicationView newView = CoreApplication.CreateNewView();
            int newViewId = 0;
            await newView.Dispatcher.RunAsync(CoreDispatcherPriority.Normal, () =>
            {
                Frame frame = new Frame();
                frame.Navigate(typeof(Secondary), null);
                Window.Current.Content = frame;
                // You have to activate the window in order to show it later.
                Window.Current.Activate();

                newViewId = ApplicationView.GetForCurrentView().Id;
            });

            bool viewShown = await ApplicationViewSwitcher.TryShowAsStandaloneAsync(newViewId);

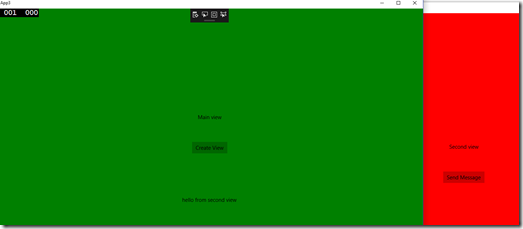
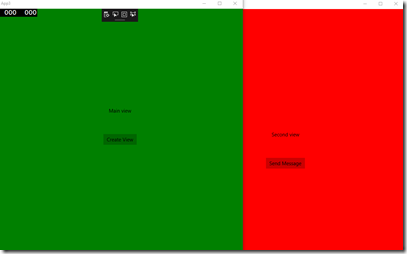
Here’s an example output:

image

There’s a good tutorial about multi view app development at Dev Center: Show multiple views for an app.

Next, let’s look how we can make the views to communicate with each other.

Example app

In our example app we have two views: The main one and a secondary. Secondary view contains a button and when clicked, we want to update the main view.

Main view has method which updates the TextBlock:


        public void UpdateMessage(string newMessage)
        {
            this.Message.Text = newMessage;
        }

The problem

As mentioned, all the views have different threads in UWP. As with Windows Forms and WPF, there’s only one thread which can access UI controls. Trying to access them from other threads will cause exceptions.

The first approach to multi view communication in UWP is the direct one: We pass the main view to secondary view and try to update the main view’s TextBox directly using MainPage.UpdateMessage:

Main view is passed to Secondary View:

                frame.Navigate(typeof(Secondary), this);

Secondary view receives the Main view:

        protected override void OnNavigatedTo(NavigationEventArgs e)
        {
            this.MainPage = (MainPage) e.Parameter;
        }
 

Main view’s UpdateMessage is called directly:

        private void ButtonBase_OnClick(object sender, RoutedEventArgs e)
        {
            this.MainPage.UpdateMessage("Hello from second view");
        }

Here we hit the problem: This throws an exception:

image

First solution to this problem is using CoreDispatcher directly.

First option: Directly using CoreDispatcher

We can use Main View’s CoreDispatcher to get around this problem. The change is done on the UpdateMessage-method:

        public void UpdateMessage(string newMessage)
        {
            this.Dispatcher.RunAsync(CoreDispatcherPriority.Normal, () => this.Message.Text = newMessage);
        }

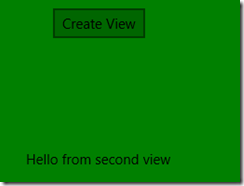
With this, we get the desired result:

image

Second option: EventAggregator

The first option works but if there is much communication between the views, it can be tedious to manually call CoreDispatcher at every point. Another option is to change the pattern:

Insted of views communicating directly with each other, you add a middle man which handles the communication between views. EventAggregator is a familiar pattern and it fits into this problem nicely: You raise messages from your views and if some other view is interested, it acts on that message.

I’ve posted a gist which contains a source code of a multi-view UWP EventAggregator. You can examine it to get the idea but in production use it’s good to use something like WeakReferences so that EventAggregator knows when to let go of views.

The idea in this pattern is that you create one EventAggregator for each of your views but the EventAggregator contains a static (shared) list of subscribers which are common to all the views. Here’s what we change in our example app:

Main view:

        
    public sealed partial class MainPage : Page, MainPage.ISubscriber
    {
        public MainPage()
        {
            this.InitializeComponent();
            var eventAggregator = new MyEventAggregator();
            eventAggregator.Subscribe(this);
        }

Note that MainPage now implements ISubscriber.

Secondary view:

        
        public Secondary()
        {
            this.InitializeComponent();
            this.EventAggregator = new MyEventAggregator();
        }

Note that there’s no need to pass Main view to Secondary view: Secondary view doesn’t have to know that Main view exists.

Secondary view raises a message:

        private void ButtonBase_OnClick(object sender, RoutedEventArgs e)
        {
            this.EventAggregator.Publish(new Message("hello from second view"));
        }

Main view handles the message:

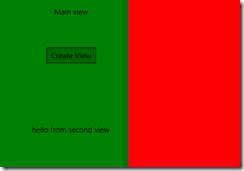
        public void Handle(Message message)
        {
            this.Message.Text = message.Text;
        }

image

Conclusion

Different view threads in UWP apps can bite you. You can get around the problem using CoreDispatcher. If there’s much communication happening between the views, it can be better to use a middle man (mediator) to handle the cross thread communication. EventAggregator is one example of this kind of a pattern.

0 Comments
  •   Posted in: 
  • UWP

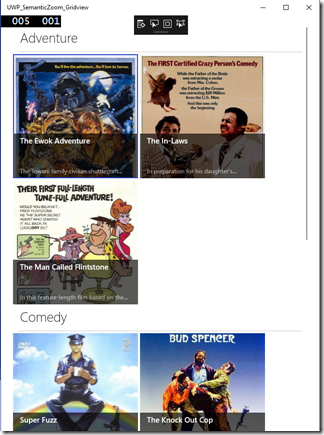
image There’s some cases where SemanticZoom in an UWP app provides a nice way of quickly navigating your app’s content. On the other hand SemanticZoom is something which can be hard for your app’s users to find so one should use it sparingly.

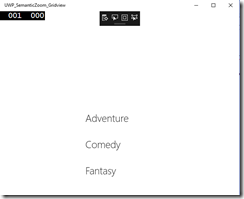
I’ve posted one sample app about SemanticZoom to GitHub. It’s a C# / MVVM app which shows how to combine GridView with SemanticZoom. To get the zoomed out view, you can use CTRL+Mousewheel:

image

Get the code from here:

https://github.com/mikoskinen/UWP-SemanticZoom-GridView

To learn more about SemanticZoom, you can visit Microsoft’s documentation.