0 Comments
  •   Posted in: 
  • UWP

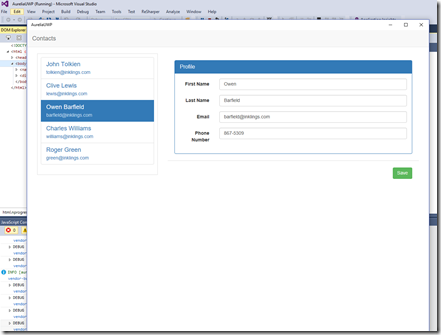
imageThe first part of our Aurelia & UWP tutorial showed us how to get started. As mentioned in the end of that post, it was easy to get started but when you start using the Aurelia app using desktop, you’ll notice that you can’t navigate backwards.

This second part of our tutorial will show you how to add back button into your app.

The back button in UWP apps

If you’ve built UWP apps using C# & XAML, you’ve quite likely encountered SystemNavigationManager. Through it, you can add the standard backward navigation button into your app:

image

More about this from the MSDN: Navigation history and backwards navigation for UWP apps

The back button in Aurelia UWP app

So if we can use SystemNavigationManager in C#, what can we do in our Aurelia app? We can use the same SystemNavigationManager!

var systemNavigationManager = Windows.UI.Core.SystemNavigationManager.getForCurrentView();

That’s one big nice thing in UWP: You can access the same WinRT classes and methods from Javascript in addition to C# and C++.

To add the back button, add backbutton.js into your app with the following content:

1
2
3
4
5
6
7
8
9
10
11
12
13
14
15
16
17
18
19
20
21
22
23
24
25
26
(function () {
var systemNavigationManager = Windows.UI.Core.SystemNavigationManager.getForCurrentView();
systemNavigationManager.addEventListener("backrequested", handleSystemNavigationEvent.bind(this));
window.onpopstate =function () {
var systemNavigation = Windows.UI.Core.SystemNavigationManager.getForCurrentView();
if (endsWith(window.location.href,"index.html")) {
systemNavigation.appViewBackButtonVisibility = Windows.UI.Core.AppViewBackButtonVisibility.collapsed;
}else {
systemNavigation.appViewBackButtonVisibility = Windows.UI.Core.AppViewBackButtonVisibility.visible;
}
};
})();
function handleSystemNavigationEvent(args) {
args.handled =true;
window.history.back();
}
function endsWith(str, suffix) {
return str.slice(-suffix.length) === suffix;
}

Then reference backbutton.js in index.html:

image

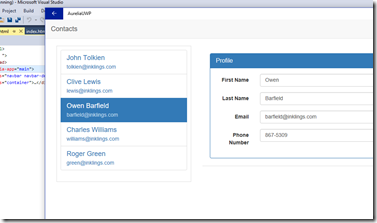
That’s it. You should now see the back button in your app’s title bar when you navigate away from the home page.

image

You can find the full example from GitHub: https://github.com/mikoskinen/aurelia-uwp/

In part three of Aurelia and UWP tutorial we look how to integrate more UWP app features inside your Aurelia app: The goal is to integrate the Aurelia app with Windows 10 and to make it behave like a standard C#/XAML based UWP app.

0 Comments
  •   Posted in: 
  • UWP

imageLately we’ve been writing some apps using Aurelia. Aurelia isn’t the only Javascript framework out there but it’s easily the most productive we have encountered. For someone who has been writing XAML/C# apps for the last seven years or so, Aurelia is the first platform which gives us the same kind of a feeling of productivity as the XAML/C#.

Some of the apps we’ve been building have been such that it would be great if we could release them to the Windows Store. Here’s a step-by-step tutorial on how to package the Aurelia app as an UWP app.

Requirements

Before starting, make sure that you have aurelia-cli up and running. For sample app we can use Aurelia’s “official” todo example app. You can get it from GitHub.

1. Create new UWP app

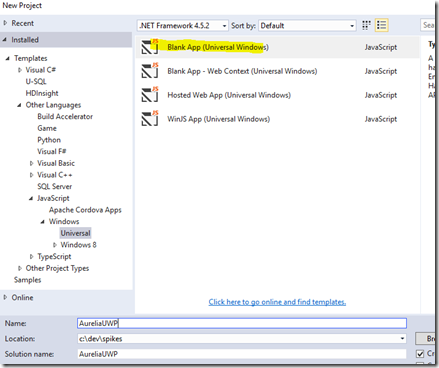
First, let’s create a new UWP app using the “Blank App (Universal Windows)” template:

image

2. Copy the Aurelia app inside the UWP app’s folder

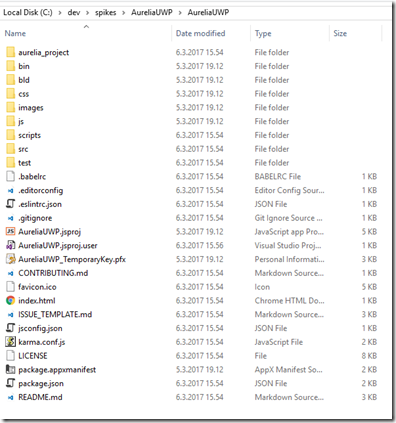
Now get your Aurelia app or the todo-example app and copy its source code inside the UWP app’s root folder. This should override the default index.html and your folder should now look like the following:

image

3. Build Aurelia app

Next step is to build the Aurelia app. If you’ve just copied the example app from GitHub, you must first install its dependencies:

npm install

When you have the dependencies installed, build the app using aurelia-cli:

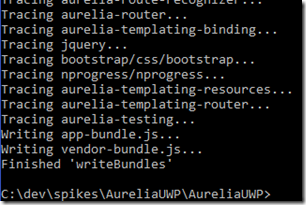
au build

image

4. Include required files in Visual Studio

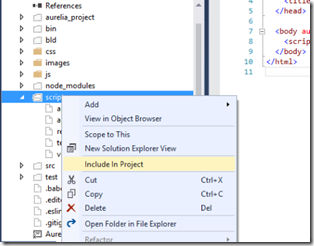
Last step is to include the required files using Visual Studio. Select “scripts” folder and “Include in project”:

image

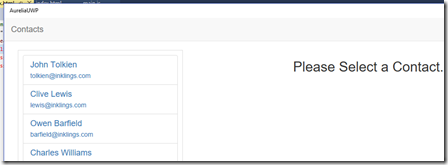
And you’re all set! Just use F5 to run the app:

image

Conclusion

This tutorial showed you how to “port” Aurelia app to an UWP app.

The source code is available from GitHub.

When you start using the app, you’ll quite likely notice a big problem quickly: There’s no back-button. The part 2 of this series shows how you can add the standard back-button, allowing desktop users to navigate back in your Aurelia app.

0 Comments

This post shows how to encrypt and decrypt string in ASP.NET Core.


Encrypt decrypt output

Lately I’ve been working with ASP.NET Core. The .NET Core moves things around a little bit, at least until .NET Standard 2.0 arrives. Here’s some simple code which I’ve been using to encrypt and decrypt a string in ASP.NET Core using a static key.

First, the example console app:

        public static void Main(string[] args)
        {
            var content = "Example test";
            var key = "E546C8DF278CD5931069B522E695D4F2";

            var encrypted = EncryptString(content, key);
            Console.WriteLine(encrypted);

            var decrypted = DecryptString(encrypted, key);
            Console.WriteLine(decrypted);

            Console.ReadLine();
        }

Secondly, the source code for EncryptString and DecryptString:

        public static string EncryptString(string text, string keyString)
        {
            var key = Encoding.UTF8.GetBytes(keyString);

            using (var aesAlg = Aes.Create())
            {
                using (var encryptor = aesAlg.CreateEncryptor(key, aesAlg.IV))
                {
                    using (var msEncrypt = new MemoryStream())
                    {
                        using (var csEncrypt = new CryptoStream(msEncrypt, encryptor, CryptoStreamMode.Write))
                        using (var swEncrypt = new StreamWriter(csEncrypt))
                        {
                            swEncrypt.Write(text);
                        }

                        var iv = aesAlg.IV;

                        var decryptedContent = msEncrypt.ToArray();

                        var result = new byte[iv.Length + decryptedContent.Length];

                        Buffer.BlockCopy(iv, 0, result, 0, iv.Length);
                        Buffer.BlockCopy(decryptedContent, 0, result, iv.Length, decryptedContent.Length);

                        return Convert.ToBase64String(result);
                    }
                }
            }
        }

        public static string DecryptString(string cipherText, string keyString)
        {
            var fullCipher = Convert.FromBase64String(cipherText);

            var iv = new byte[16];
            var cipher = new byte[16];

            Buffer.BlockCopy(fullCipher, 0, iv, 0, iv.Length);
            Buffer.BlockCopy(fullCipher, iv.Length, cipher, 0, iv.Length);
            var key = Encoding.UTF8.GetBytes(keyString);

            using (var aesAlg = Aes.Create())
            {
                using (var decryptor = aesAlg.CreateDecryptor(key, iv))
                {
                    string result;
                    using (var msDecrypt = new MemoryStream(cipher))
                    {
                        using (var csDecrypt = new CryptoStream(msDecrypt, decryptor, CryptoStreamMode.Read))
                        {
                            using (var srDecrypt = new StreamReader(csDecrypt))
                            {
                                result = srDecrypt.ReadToEnd();
                            }
                        }
                    }

                    return result;
                }
            }
        }

image

0 Comments

logoAzure Blob Bridge for IFTTT provides an easy way to use Azure Blob storage as a IFTTT output Channel (action). For introduction of the project, you can read the Azure Blob Bridge for IFTTT: Introduction.

This post includes a step-by-step guide for using Azure Blob Bridge for IFTTT. The guide is split in two parts:

  • Deploying Azure Blob Bridge for IFTTT
  • Creating a IFTTT recipe using the Maker Channel

By following this tutorial you will connect the BBC’s RSSwith your Azure Blob Storage.

TL;DR

  1. Deploy Azure Blob Bridge for IFTTT using the Deploy to Azure button: https://github.com/mikoskinen/AzureBlobBridgeIFTTT
  2. Use IFTTT’s Maker Channel to POST to bridge

Requirements

You need the following things to work through this tutorial:

  • Working Azure subscription
  • Azure Storage account
  • IFTTT Account connected to the Maker Channel

Deploying Azure Blob Bridge for IFTTT

The goal for Azure Blob Bridge for IFTTT’s deployment process is to be as simple as possible. The steps include:

  1. Visit the bridge’s home page at GitHub: https://github.com/mikoskinen/AzureBlobBridgeIFTTT
  2. Click the “Deploy to Azure” Button
  3. Configure the required settings
  4. Click Next
  5. Click Deploy
  6. All set

1. Open the Azure Blob Bridge site

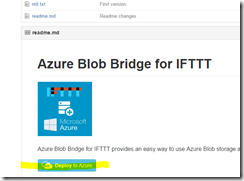
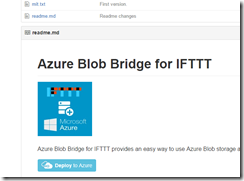
Visit https://github.com/mikoskinen/AzureBlobBridgeIFTTT with your browser:
image

2. Click the Deploy to Azure button

image

3. Configure the required the settings

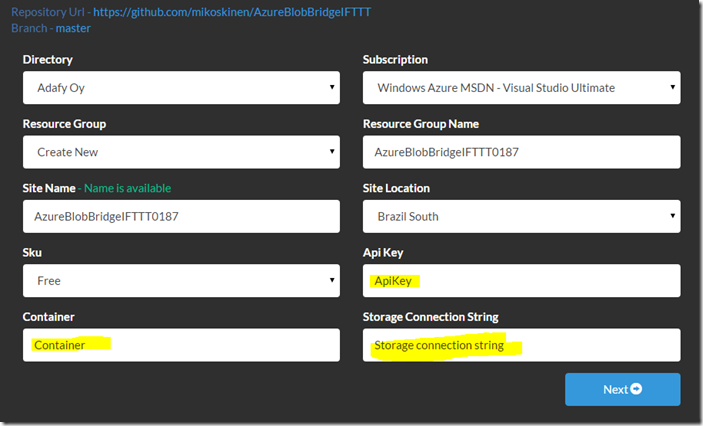
The hardest part is configuring the settings. The Deploy to Azure page contains three (3) settings which you must manually configure, others are automatically set by the site. The manually configured settings are highlighted here:
image

ApiKey decides how the bridge is reached. Example: ApiKey = "hello" -> Your API works through http://yourdomain.com/api/hello.

In this guide we will use MyBridgeKey.

Container is the name of your Azure Blob Storage container where the blobs will be stored. The container will be automatically created if it’s missing.

In this guide we will use mybridgecontainer. (note: you cannot use upper case character)

Storage Connection Stringis used to connect the bridge to your Azure Blob Storage. The connection string is available through Azure portal’s Storage Accounts blade. From Manage, click Keys and copy the Secondary connection string:

image

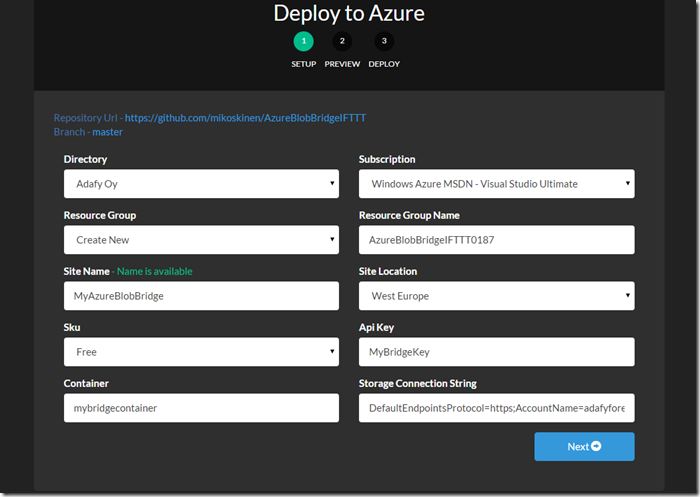
In this tutorial we will be deploying the Azure Blob Bridge for IFTTT to the West Europe, using the site name MyAzureBlobBridge. Our full configuration is shown here:
image

4. Click Next

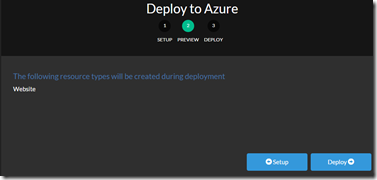
After clicking Next, the deploy site will show you that only a Website resource is created:
image

5. Click Deploy

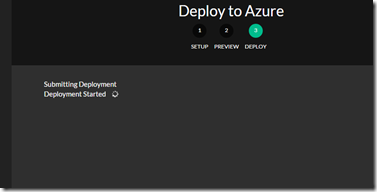
Select Deploy and wait the site to do it’s magic:
image

It should take less than a minute to complete:
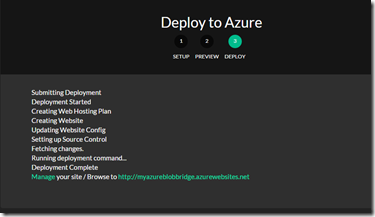
image

6. All set

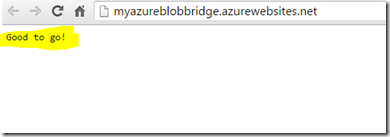
Deployment completed and shows you the Browse link. Click it to make sure that everything is working correctly. You should see text “Good to go!” if everything is up and running. If you see an error, make sure that the configuration is set correctly.
image

Now we have a working Azure Blob Bridge for IFTTT. It’s time to setup the IFTTT.

Other alternatives for deployment

If you don’t want to use the “Deploy to Azure” button, you can clone the repo, create the Azure Web Site manually, set Web.config for the required configuration and push your repo to site.

Creating a IFTTT recipe using the Maker Channel

IFTTT makes it easy to connect to our newly set Azure blob bridge. The steps include:

  1. Create a new recipe
  2. Configure the IF-part (source Channel / trigger)
  3. Configure the Then-part (output Channel / action)

1. Create a new recipe

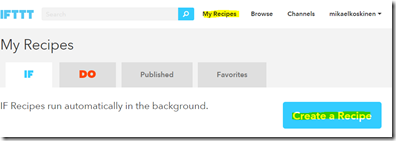
Start by selecting Create a Recipefrom My Recipes page:
image

Click “this” to start configuration:

image

2. Configure the IF-part (source Channel / trigger)

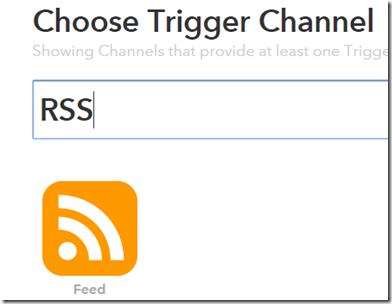
In this tutorial we will be using RSS Feed as a Trigger:
image

Select “Feed” and then click “New feed item”. This way the trigger is automatically run everytime a new item is posted into the RSS feed.
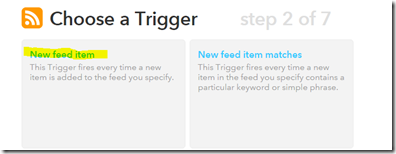
image

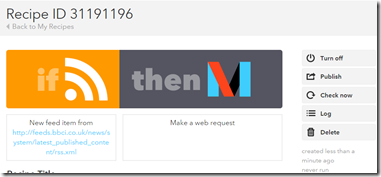
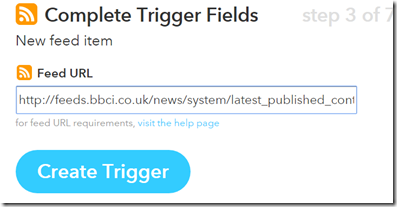
After selecting the “New feed item”, you must fill in your desired RSS source. For this tutorial we will be using BBC’s RSS feed as that gets updated quite often. Fill in the address: http://feeds.bbci.co.uk/news/system/latest_published_content/rss.xml
image

And finally select “Create Trigger”. You trigger is now ready.

3. Configure the Then-part (output Channel / action)

The trigger is now ready so it’s time to set the output channel or the action. Select “that” to continue:

image

IFTTT lists all the available action channels. We will use Maker Channel to connect to our newly created Azure Blob Bridge.
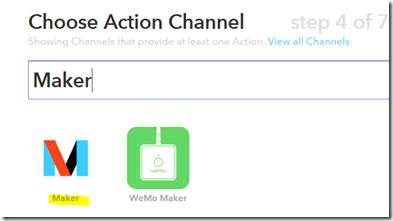
image

Select Maker. The “Make a web request” is the only available option so continue by selecting it:
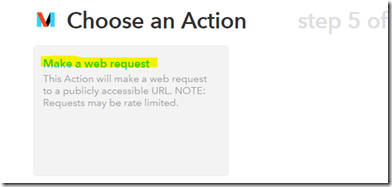
image

Now we must configure Maker so that it’s connected to our bridge.
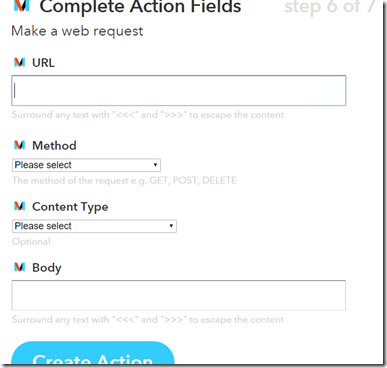
image

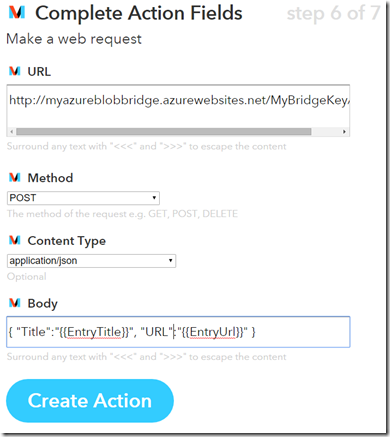
In the first part of the tutorial, we published the Azure Blob Bridge for IFTTT to url http://myazureblobbridge.azurewebsites.net/ and we used the Api Key MyBridgeKey. This means that the bridge is available through URL http://myazureblobbridge.azurewebsites.net/api/MyBridgeKey/. Fill that in.

The bridge accepts POST requests, so select POST in Method.

We want to store the new items as JSON-files, so select application/json in Content Type.

Finally, the body is used to configure the content of the new Azure Blob. We want to store the URL and the Title of the news item. To save them in correct JSON-format, fill in the following text in Body:

{ "Title":"{{EntryTitle}}", "URL":"{{EntryUrl}}" }

The complete configuration is shown here:
image

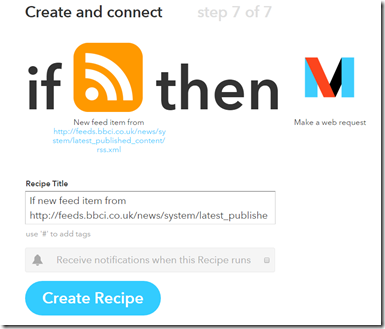
To finish the tutorial, select “Create Action” and then “Create Recipe”.
image

And you’re done!

image

Final Words

By following this tutorial you have connected the BBC’s RSS with your Azure Blob Storage. As the BBC feed is updated quite often, you should soon see new blobs in your Azure Blob storage. As an example, here’s the content of the blob 635859502521919728.dat, as created by the recipe:

{
	"Title": "Device 'goes off' at shopping centre",
	"URL": "http://www.bbc.co.uk/news/uk-england-lancashire-35122044#sa-ns_mchannel=rss&ns_source=PublicRSS20-sa"
}

Using RSS as a trigger is just a one example of how you can use Azure Blob Bridge for IFTTT. IFTTT contains more than 240 channels which now can be connected with the Azure Blob storage.
0 Comments

logoAzure Blob Bridge for IFTTT provides an easy way to use Azure Blob storage as a IFTTT destination Channel.

In this post I’ll introduce you to the Azure Blob Bridge for IFTTT project. I will follow up with a tutorial which will include:

  • Deploying Azure Blob Bridge for IFTTT
  • Creating a IFTTT recipe using the Maker channel

Background

IFTTT is a web-based service that allows users to create chains of simple conditional statements, called "recipes", which are triggered based on changes to other web services such as Gmail, Facebook, Instagram, and Pinterest. IFTTT is an abbreviation of "If This Then That"…

https://en.wikipedia.org/wiki/IFTTT

Wikipedia's description of IFTTT is accurate: It allows you to chain web services together. For example, I’ve been using it to write new posts from Feedly into our Wordpress.

Unfortunately IFTTT doesn't currently provide Channel for Azure Blob storage. Azure Blob Bridge for IFTTT -project can be used to work around the limitation. The project works as an output Channel (“action”) for IFTTT. Using Azure Blob Bridge for IFTTT as a Trigger is coming later.

Implementation

Azure Blob Bridge works by providing HTTP POST API for uploading blobs to your Azure Storage Account. The project is implemented using Nancy and C#.

The project creates a POST uri based on your configuration’s apiKey. For example, if you set your apiKey to “myKey”, you can access the bridge through /api/myKey/.

The new blob will be created from the request’s content (body). Content-type is set if provided in request headers. File name is automatically generated using DateTime.UtcNow.Ticks + ".dat".

Usage with HTTP POST

To write a blob to your Azure Blob storage, send a HTTP POST Request to the Azure Blob Bridge for IFTT:

POST http://myapp.domain.com/api/apikey HTTP/1.1
Content-Length: 38
Content-type: Application/json

{"author":"hello", "text":"mycontent"}

Configuration

You need to define three configuration settings, either through the Azure Deploy or through Web.config:

  • apiKey = Api key is used to define the URL for your api. NOTE: Use only valid URI characters. Example: apiKey = "hello" -> Your API works through http://yourdomain.com/api/hello
  • storageConnectionString = The Azure Storage connection string. Example: DefaultEndpointsProtocol=https;AccountName=mystoragewe;AccountKey=wjN544545444233rwsdsdddddkkkkkkk999999999923wu3zJXSoBJ4LAWBbtEYKqbwjIQ==
  • container = The Azure container where files will be written. NOTE: Use only valid container character (so no upper cases or numbers). If container is missing, it will be automatically created as private. Example: mycontainer

Code

The Azure Blob Bridge for IFTTT is available through GitHub as an open source project.

License

The project is distributed under the terms of the MIT License (see mit.txt).