0 Comments

Azure’s REST API requires Date or x-ms-date header. As specified by HTTP protocol, the Date (or x-ms-date) header must be in RFC 1123 format.

Example of Date in RFC 1123 format

Wed, 09 Dec 2015 18:59:42 GMT

Converting DateTime to RFC 1123 in C#

In C# DateTime can be converted to RFC 1123 using the “r” format. Example:

var result = DateTime.Now.ToUniversalTime().ToString("r");

Web Tool

Perhaps the easiest way to get the current date time in RFC 1123 format is through the http://http-date.com/. This web tool, created by Leonard Wallentin, provides not just the current date time in correct format but also "30 days from now" and “365 days from now". The tool has proven itself really useful in the last few days when working with the Azure blobs using the REST API.

0 Comments

Recently I blogged about the VB.NET String Concatenation Weirdness. That’s not the only thing which can hit you if you mainly code in C#. Here’s an another example, as pointed out by my co-worker Panu Oksala. This time the weirdness is related to If and nullable fields.

Here’s some simple code:

        Dim myDate As DateTime?

        myDate = Nothing

        If (myDate Is Nothing) Then
            Console.WriteLine("Date is null")
        Else
            Console.WriteLine(myDate)
        End If

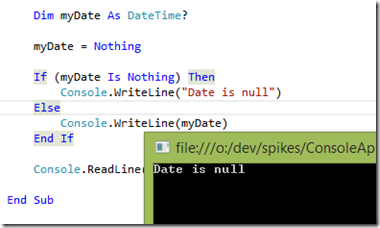
As expected, this outputs “Date is null”:

image

But, if we include If-statement in the myDate-assignment:

        Dim myDate As DateTime?

        myDate = If(True, Nothing, DateTime.Today)

        If (myDate Is Nothing) Then
            Console.WriteLine("Date is null")
        Else
            Console.WriteLine(myDate)
        End If

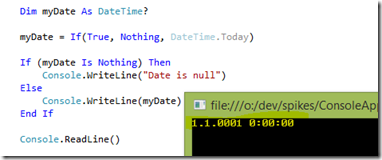
And then run the app, things get interesting:

image

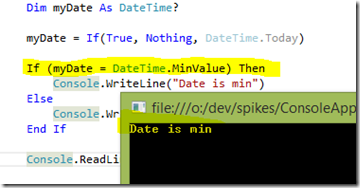
So, we’re not getting “Date is null”. And we’re not getting the other if-option which is DateTime.Today. Instead, myDate is initialized as DateTime.MinValue:

image

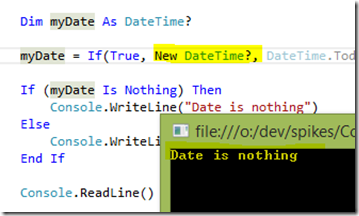
Solution to the issue is to use new DateTime? instead of Nothing:

image

The following StackOverflow question contains more info about why this is happening.

0 Comments

NXMLFormatter is an open-source XML Formatter and beautifier written with C#. The DLL is available as a portable class library, so you can use it from UWP, ASP.NET etc.

Usage

  1. Add reference to NXMLFormatter.dll.
  2. var formattedXML = NXMLFormatter.Formatter.Format(originalXML);

Project doesn't have any external references and it uses only the features provided by the .NET Framework.

NuGet

NXMLFormatter is available through the NuGet with the package name NXMLFormatter. Type "install-package NXMLFormatter" to install it.

Example

Input
<catalog><book id="bk101"><author>Gambardella, Matthew</author>
<title>XML Developer's Guide</title>
<genre>Computer</genre><price>44.95</price><publish_date>2000-10-01</publish_date><description>An in-depth look at creating applications with XML.</description>
</book>
<book id="bk102">   <author>Ralls, Kim</author>   <title>Midnight Rain</title>
<genre>Fantasy</genre>
<price>5.95</price>
<publish_date>2000-12-16</publish_date>
<description>A former architect battles corporate zombies, an evil sorceress, and her own childhood to become queen of the world.</description></book>
<book id="bk103">   <author>Corets, Eva</author>   <title>Maeve Ascendant</title>   <genre>Fantasy</genre>
   <price>5.95</price>   <publish_date>2000-11-17</publish_date>
   <description>After the collapse of a nanotechnology society in England, the young survivors lay the 
   foundation for a new society.</description></book></catalog>
Output
<catalog>
  <book
    id="bk101">
    <author>Gambardella, Matthew</author>
    <title>XML Developer's Guide</title>
    <genre>Computer</genre>
    <price>44.95</price>
    <publish_date>2000-10-01</publish_date>
    <description>An in-depth look at creating applications with XML.</description>
  </book>
  <book
    id="bk102">
    <author>Ralls, Kim</author>
    <title>Midnight Rain</title>
    <genre>Fantasy</genre>
    <price>5.95</price>
    <publish_date>2000-12-16</publish_date>
    <description>A former architect battles corporate zombies, an evil sorceress, and her own childhood to become queen of the world.</description>
  </book>
  <book
    id="bk103">
    <author>Corets, Eva</author>
    <title>Maeve Ascendant</title>
    <genre>Fantasy</genre>
    <price>5.95</price>
    <publish_date>2000-11-17</publish_date>
    <description>After the collapse of a nanotechnology society in England, the young survivors lay the 
   foundation for a new society.</description>
  </book>
</catalog>

Implementation

Under the covers the library uses XmlWriter to format the code.

Licenses

The library is distributed under the terms of the MIT License (see mit.txt).

Source code

NXMLFormatter’s source code is available from GitHub.

0 Comments
  •   Posted in: 
  • UWP

Problem

When you create a Universal Windows Platform app and run it in Windows 10, you may notice that the logo displayed on taskbar is not full size.

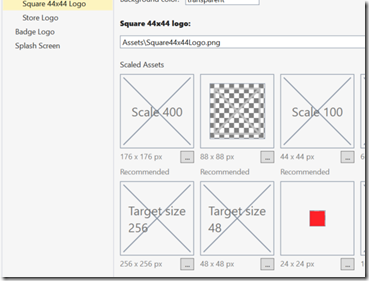
For example, if you have this beautiful 24x24 logo:

image

And you set that as your taskbar logo:

image

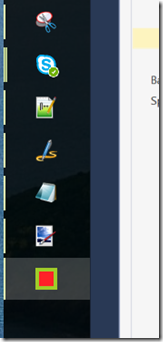
And then run the app, you’ll notice that it looks out of place:

image

Two problems:

  1. The logo is not full size
  2. The remaining space is filled with your accent color

Solution

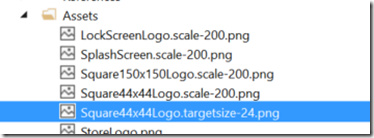
The problem can be fixed by renaming the logo file. When you set the logo through Package.appxmanifest’s designer, the asset will receive file name Square44x44Logo.targetsize-24.png:

image

Just rename the file to Square44x44Logo.targetsize-24_altform-unplated.png:

image

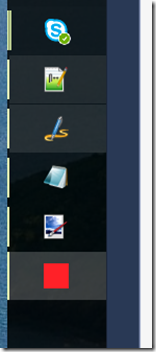
And now when you ran the app, you should see that your icon fits the taskbar nicely:

image

0 Comments
  •   Posted in: 
  • UWP

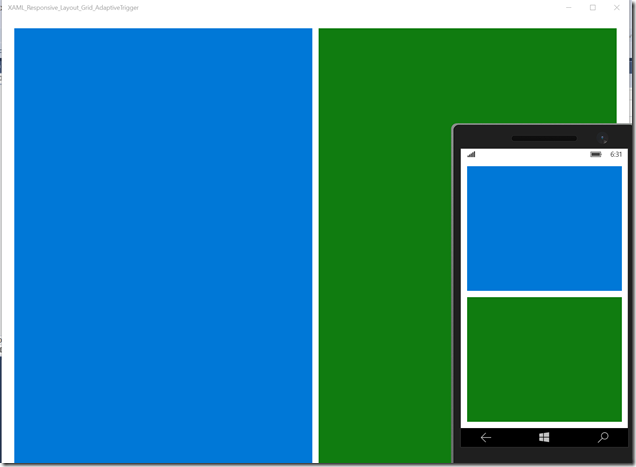
imageThis post will show you how to use repositioning to create a responsive layout for your XAML Universal Windows app (UWP) using Grid and AdaptiveTrigger.

Background

With Windows 10 and its UWP stack, making your app look nice on both mobile and desktop is one of the core requirements. The Responsive design 101 for Universal Windows Platform (UWP) apps guide on MSDN outlines six different ways for responsive design:

  • Reposition
  • Resize
  • Reflow
  • Reveal
  • Replace
  • Re-architect

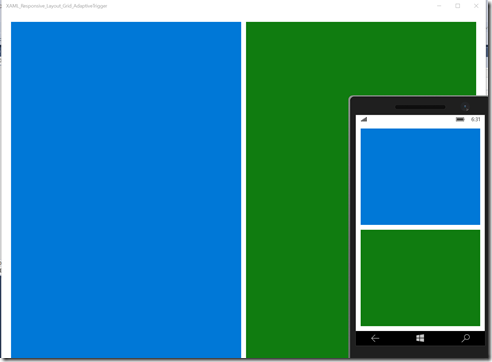
In this post we’ll use the familiar Grid-control with the AdaptiveTrigger to reposition our app’s content. On desktops and tablets the app will use 2-column layout. On mobile devices (or when user resizes the app to have a small window) the second column drops under the first one.

AdaptiveTrigger

AdaptiveTrigger is a new addition in Windows 10. You can use AdaptiveTrigger to automatically change the VisualState when the app’s width or height changes. For example the following Channel9-video contains good information about the AdaptiveTrigger.

The code

Here’s out app’s simple layout:

    <Grid Background="{ThemeResource ApplicationPageBackgroundThemeBrush}" x:Name="MainGrid">

        <Grid.ColumnDefinitions>
            <ColumnDefinition/>
            <ColumnDefinition/>
        </Grid.ColumnDefinitions>
        <Grid.RowDefinitions>
            <RowDefinition/>
            <RowDefinition/>
        </Grid.RowDefinitions>

        <Grid x:Name="FirstGrid" Grid.Column="0" Grid.Row="0" Background="#0078d7" />
        <Grid x:Name="SecondGrid" Grid.Column="1" Grid.Row="0" Background="#107C10" />

    </Grid>

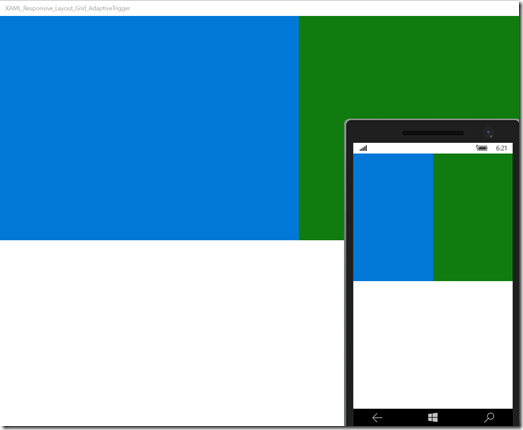
Without any VisualStates or AdaptiveTriggers, the app will look the same on all screen sizes:
image

But what we want is to reposition our SecondGrid under the FirstGridon mobile devices. To do this, we need to change the Grid.Column and Grid.Row of the SecondGrid:

                        <Setter Target="SecondGrid.(Grid.Column)" Value="0"/>
                        <Setter Target="SecondGrid.(Grid.Row)" Value="1"/>

Also, there’s no need for two columns so we modify the MainGrid for our needs:

                        <Setter Target="MainGrid.RowDefinitions[1].Height" Value="*"/>
                        <Setter Target="MainGrid.ColumnDefinitions[1].Width" Value="auto"/>

Last thing we do is change the margins to make things little prettier:

                        <Setter Target="MainGrid.Margin" Value="12"/>
                        <Setter Target="FirstGrid.Margin" Value="0 0 0 6"/>
                        <Setter Target="SecondGrid.Margin" Value="0 6 0 0"/>

And that’s it. Here’s all the VisualState changes combined. First the WideState (2-column layout):

                        <Setter Target="MainGrid.Margin" Value="24"/>
                        <Setter Target="MainGrid.RowDefinitions[1].Height" Value="auto"/>
                        <Setter Target="MainGrid.ColumnDefinitions[1].Width" Value="*"/>
                        <Setter Target="FirstGrid.Margin" Value="0 0 6 0"/>
                        <Setter Target="SecondGrid.Margin" Value="6 0 0 0"/>
                        <Setter Target="SecondGrid.(Grid.Column)" Value="1"/>
                        <Setter Target="SecondGrid.(Grid.Row)" Value="0"/>

And then the NarrowState (mobile layout):

                        <Setter Target="MainGrid.Margin" Value="12"/>
                        <Setter Target="FirstGrid.Margin" Value="0 0 0 6"/>
                        <Setter Target="SecondGrid.Margin" Value="0 6 0 0"/>
                        <Setter Target="MainGrid.RowDefinitions[1].Height" Value="*"/>
                        <Setter Target="MainGrid.ColumnDefinitions[1].Width" Value="auto"/>
                        <Setter Target="SecondGrid.(Grid.Column)" Value="0"/>
                        <Setter Target="SecondGrid.(Grid.Row)" Value="1"/>

With these few lines of XAML we have used repositioning to achieve a nice responsive layout.
image

Download source code

The full source code is available from GitHub.

https://github.com/mikoskinen/UWPResponsiveXAMLLayoutGridAdaptiveTrigger