DotNetNuke: Using jQuery in custom module
Having been busy with a small DotNetNuke-based project lately so here’s a short “how-to” for those who want to use jQuery in their own DNN-modules. This applies to DNN 5.0 and newer.
1. Installing jQuery
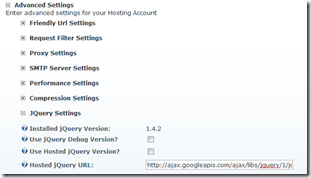
DNN by default includes the jQuery library so no manual installation is required. You can check the jQuery version from Host – Host settings – Advanced Settings – JQuery settings. This is also the place where you can make DNN to use Microsoft’s or Google’s CDN to deliver the library. If your module targets the version 5.0 of DNN (actually, 4.9.1) or newer, you can be sure that every installation includes the jQuery.
2. Request jQuery in code-behind
In your module, make sure to request for jQuery in code-behind class. Module’s Load-event is excellent place for this:
1: Private Sub Page_Load(ByVal sender As System.Object, ByVal e As System.EventArgs) Handles MyBase.Load
2:
3: Try
4:
5: If Not Page.IsPostBack Then
6:
7: DotNetNuke.Framework.jQuery.RequestRegistration()
8:
9: End If
10:
11: Catch exc As Exception
12: ProcessModuleLoadException(Me, exc)
13: End Try
14:
15: End Sub
3. Use the jQuery-word instead of $-character
For some reason the widely used jQuery-shortcut ‘$’ doesn’t always work properly inside the DotNetNuke. So it’s better to use the word jQuery instead. Here’s an example of using jQuery in the traditional way:
1: <script type="text/javascript">
2: $(document).ready(function() { 3: $("#featured > ul").tabs({ fx: { opacity: "toggle"} }).tabs("rotate", 7500, true);4: });
5: </script>
In DotNetNuke it’s better to write the function like the following:
1: <script type="text/javascript">
2: jQuery(document).ready(function() { 3: jQuery("#featured > ul").tabs({ fx: { opacity: "toggle"} }).tabs("rotate", 7500, true);4: });
5: </script>
