0 Comments

0e3c6ab1-51d4-4615-a1bb-b84b7e04af83

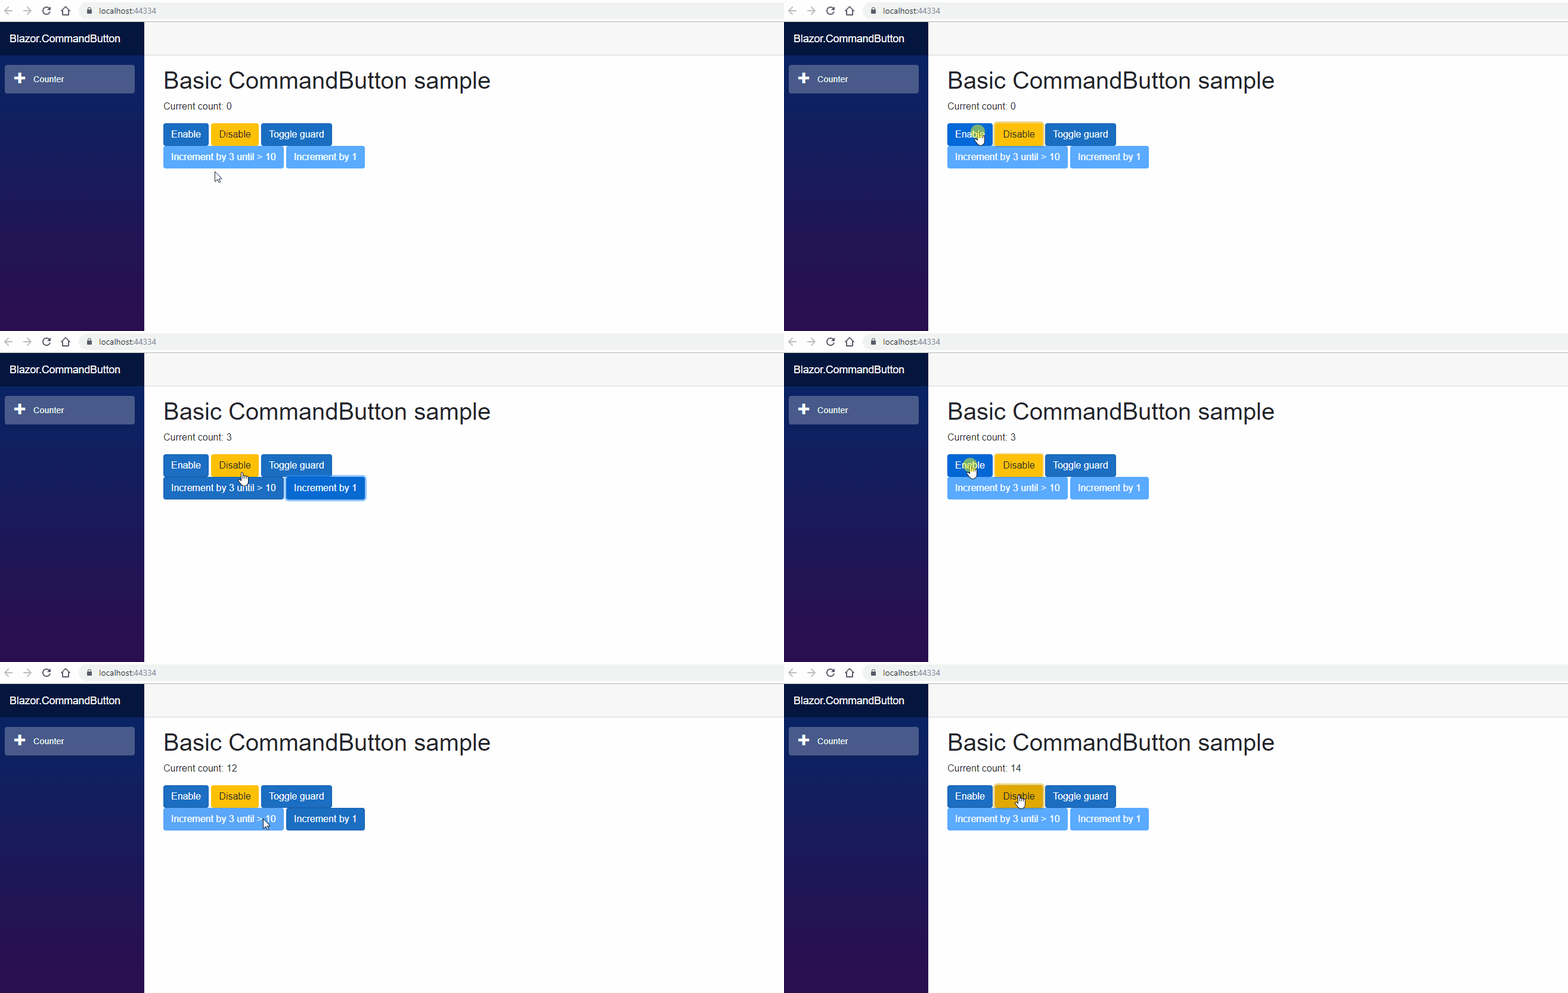
Blazor.CommandButton is a new MIT-licensed lightweight button component for Blazor. CommandButton provides support for setting a guard method or property to the button. Guard methods allow you to disable or enable buttons based on some conditions. Some examples:

  • Button is disabled if user doesn't have the appropriate authorization
  • Button is disabled if some required input is missing.

This release has been tested with the server side version of .NET Core v3.0.0-preview9 Blazor.

The first release is 0.9.0 and it’s available through Nuget. Source code is available from Github.

Getting started

You can easily switch from button to CommandButton. If you have the following code:

<button class="btn btn-primary" @onclick="@IncrementCount">Increment by 1</button>

You can change it to use CommandButton:

<CommandButton class="btn btn-primary" @onclick="@IncrementCount">Increment by 1</CommandButton>

To guard the IncrementCount-method, you can add a boolean property with name CanIncrementCount:

public bool CanIncrementCount { get; set; } = false;

If the guard return false, the button is disabled. When guard returns true, the button is automatically enabled.

Code sample

Here’s a full sample of using the CommandButton component:

<p>Current count: @currentCount</p>

<CommandButton class="btn btn-primary" @onclick="@(() => CanIncrementCount = true)">Enable</CommandButton>
<CommandButton class="btn btn-warning" @onclick="@(() => CanIncrementCount = false)">Disable</CommandButton>
<CommandButton class="btn btn-primary" @onclick="@ToggleGuard">Toggle guard</CommandButton>
<br/>
<CommandButton class="btn btn-primary" @onclick="@(() => IncrementCount(3))" Guard="@(() => currentCount < 10 && CanIncrementCount)">Increment by 3 until > 10</CommandButton>
<CommandButton class="btn btn-primary" @onclick="@IncrementCount">Increment by 1</CommandButton>

@code {
    int currentCount = 0;

    public void IncrementCount()
    {
        currentCount++;
    }

    public Task IncrementCount(int value)
    {
        currentCount += value;

        return Task.CompletedTask;
    }

    public bool CanIncrementCount { get; set; } = false;

    public void ToggleGuard()
    {
        CanIncrementCount = !CanIncrementCount;
    }
}

Guarding methods with a boolean property

If your CommandButton's onclick is bound to a method like in the previous example, CommandButton can automatically determine the guard property's name by adding "Can" infront of it.

  • IncrementCount -> CanIncrementCount
  • SaveData -> CanSaveData
  • DeleteCustomer -> CanDeleteCustomer

Guarding lambdas

If your CommandButton is bound against an lambda, guard property's name can't be automatically decided. For these scenarios you can provide the guard through component's Guard-property:

<CommandButton class="btn btn-primary" @onclick="@(() => IncrementCount(3))" Guard="@(() => currentCount < 10 && CanIncrementCount)">Increment by 3 until > 10</CommandButton>

Samples

The project site contains a full working sample of CommandButton.

Requirements

The library has been developed and tested using the following tools:

  • .NET Core 3.0 Preview 9
  • Visual Studio 2019 Preview

0 Comments

32d51f27-44ec-4fa8-8801-3dc8692e3ae7[5]

This post shows you can add Blazor based pages into an existing Razor Pages application. 

Background

First RTM release of Blazor should happen in two weeks. Things are still changing quite rapidly, and the latest preview 9 made the interop between Razor Pages and Blazor components much harder: It’s not possible anymore to pass parameters from a Razor Page to a Blazor component using Html.RenderComponentAsync. This may change in future but it’s quite likely that .NET Core 3.0 will arrive with this limitation.

If you still would like to enhance your existing Razor Pages based application with some Blazor magic, one solution is completely create your pages in Blazor. This post shows you can add Blazor based pages into an existing Razor Pages application, where parts of the app are created using Razor Pages and parts of the app are created using Blazor Pages. Same layout is used for both types of pages.

Step One: Blazor support

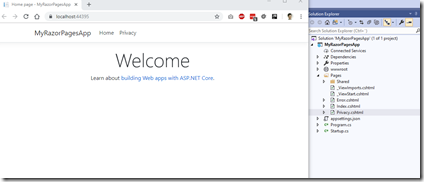
We start with an existing Razor Pages application which has been converted to .NET Core 3:

image

First, you have to add Blazor support into your application. This support will allow you to render Blazor components from a Razor page. The official documentation goes through the process but here’s a quick rundown of it.

Startup.cs:

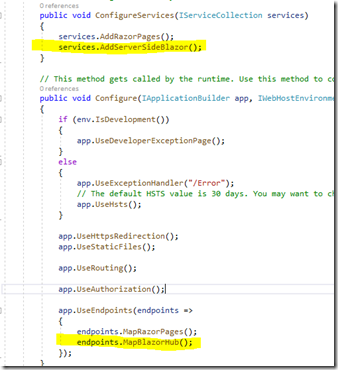
Services.AddServerSideBlazor is needed in ConfigureServices and endpoints.MapBlazorHub in Configure:

image

_Layout.cshtml:

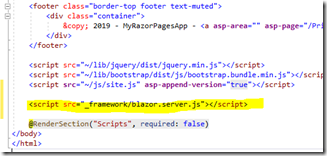
Blazor’s JS-library is needed in order to enable server side Blazor. This can be added into _Layout.cshtml:

image

    <script src="_framework/blazor.server.js"></script>

_Imports.razor:

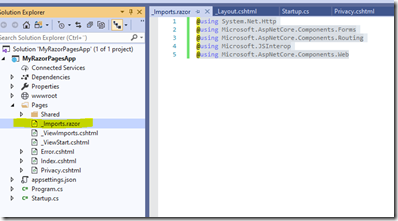
We also need a new file called _Imports.razor. This should be added into the Pages-folder:

image

_Imports.razor is used to set the using-statements for your Blazor components. We can start with the following:

@using System.Net.Http
@using Microsoft.AspNetCore.Components.Forms
@using Microsoft.AspNetCore.Components.Routing
@using Microsoft.JSInterop
@using Microsoft.AspNetCore.Components.Web

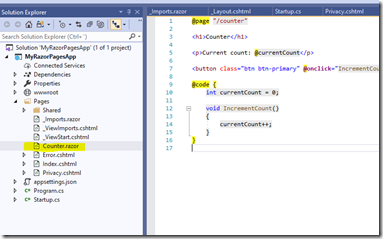
And that’s it.We now should have a working Blazor-support in our existing app. We can test this out by copy-pasting the classic Counter-component into our app:

image

@page "/counter"

<h1>Counter</h1>

<p>Current count: @currentCount</p>

<button class="btn btn-primary" @onclick="IncrementCount">Click me</button>

@code {
    int currentCount = 0;

    void IncrementCount()
    {
        currentCount++;
    }
}

And then editing Privacy.cshtml to include the Counter component:

@page
@model PrivacyModel
@{
    ViewData["Title"] = "Privacy Policy";
}
<h1>@ViewData["Title"]</h1>

<p>Use this page to detail your site's privacy policy.</p>

<component>@(await Html.RenderComponentAsync<Counter>(RenderMode.Server))</component>

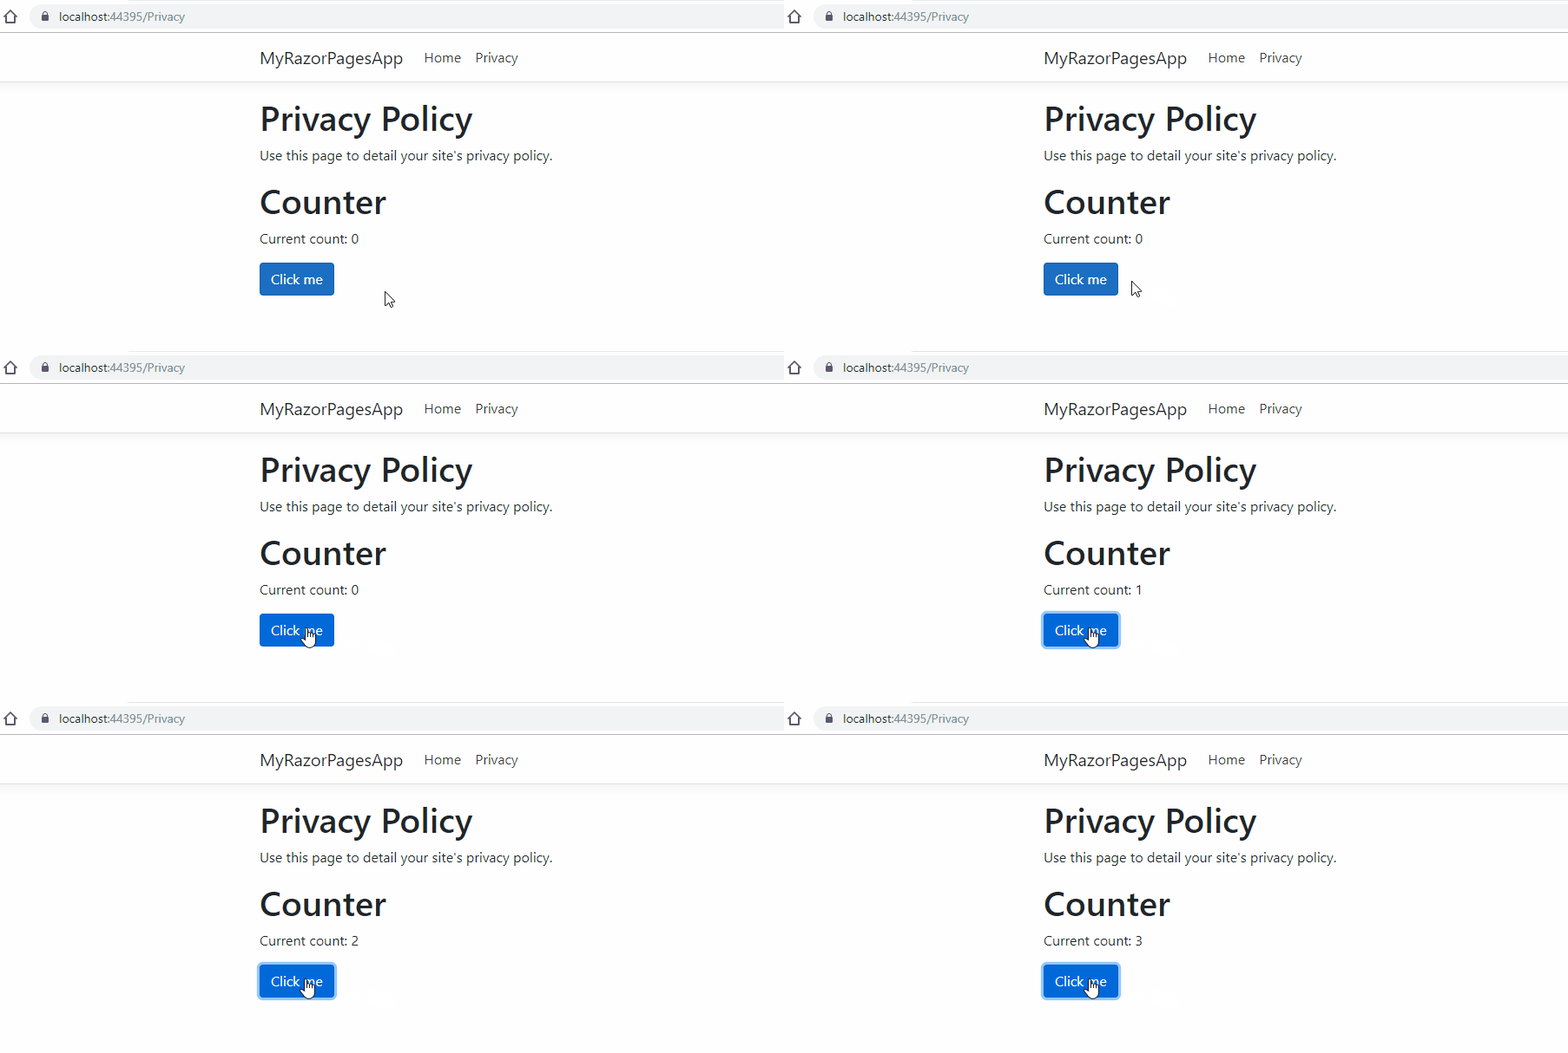
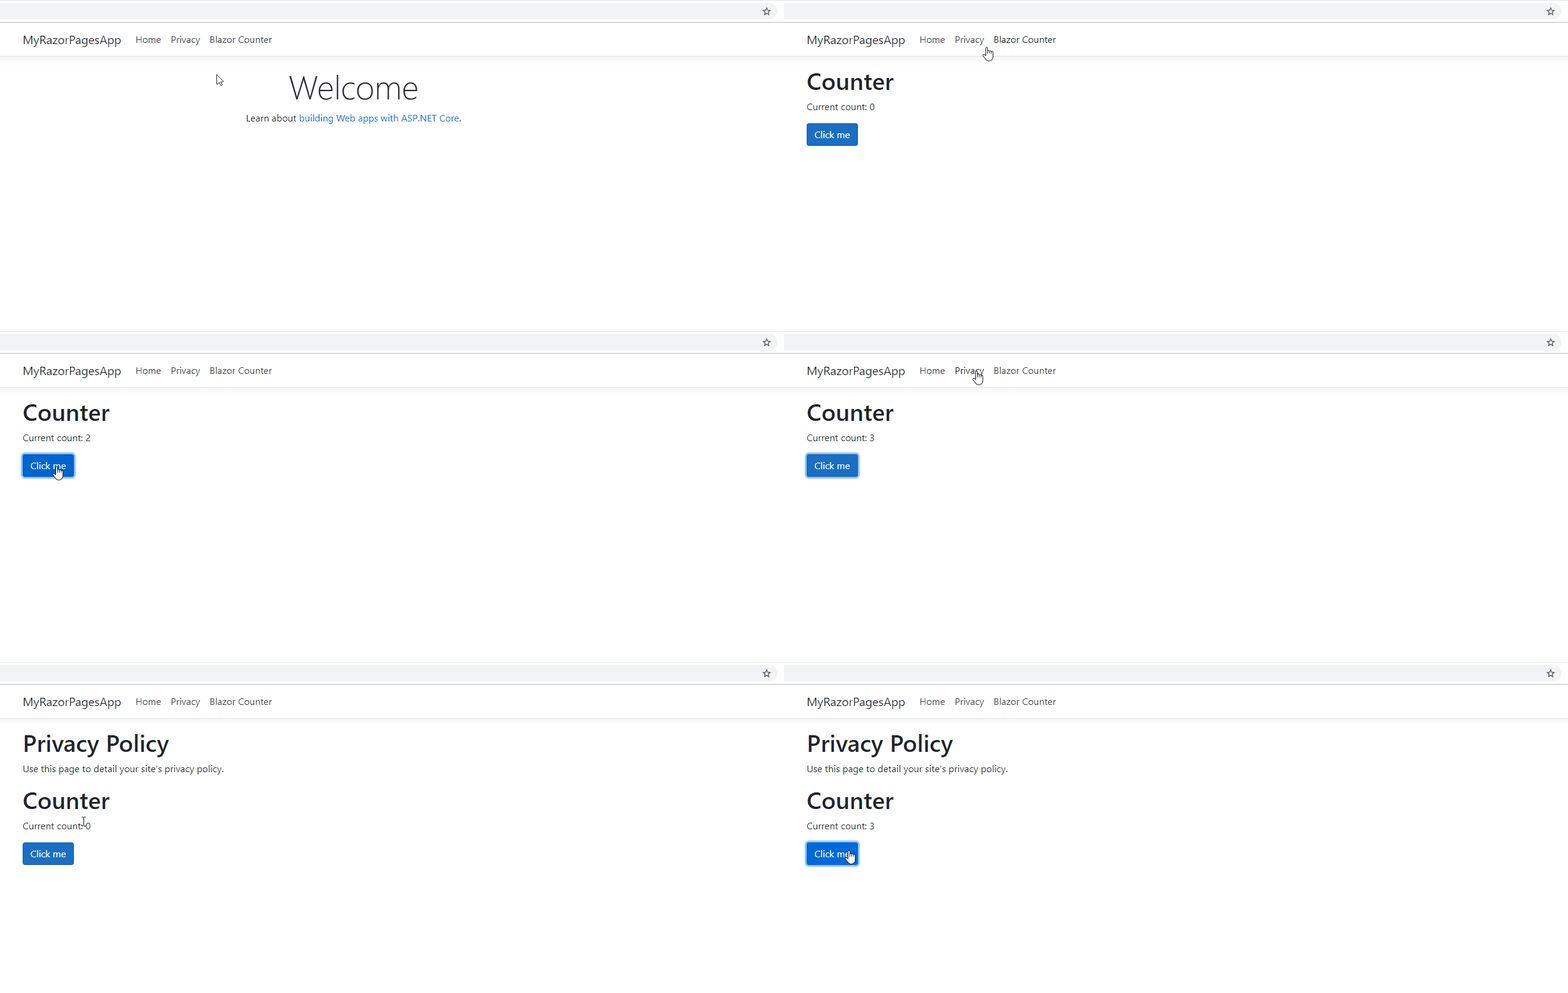
Now when we run the app, we should have a working Counter component inside our page:

9cae988e-879b-4bf5-80cf-c5622a5e0a36

Next part of this post show you can change your Razor Pages application so that instead of just adding components into existing pages, you can create full-blown Blazor pages.

Step Two: Blazor Pages support

Our Blazor component defines a route “/counter”:

image

But navigating there doesn’t work:

image

Our aim in step two is to make the routing to Blazor Pages work. And we want the Blazor Pages to use the same layout as the Razor Pages. For this we need a few things, starting with a Router.

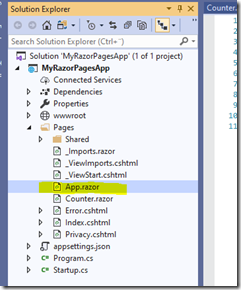
App.razor:

Create a new App.razor file into Pages-folder:

image

The Router component is defined in App.razor:

@using Microsoft.AspNetCore.Components.Routing

<Router AppAssembly="typeof(Program).Assembly">
    <Found Context="routeData">
        <RouteView RouteData="routeData"/>
    </Found>
    <NotFound>
        <h1>Page not found</h1>
        <p>Sorry, but there's nothing here!</p>
    </NotFound>
</Router>

The router automatically goes through all the Blazor Components with the page-directive and adds routes to them.

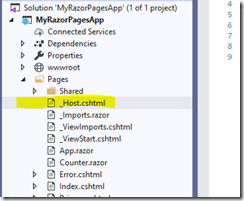
_Host.cshtml:

We also need a page which will be used to host the Blazor pages. This can be named anyway you want but the default Blazor templates use _Host.cshtml so it’s as good name as any. In the _Host.cshtml we can define the layout which in our case will be the same as the Razor pages are using.

image

_Host.cshtml contains the call to Html.RenderComponentAsync:

@page "/blazor"

@{
    Layout = "_Layout";
}

<app>
    @(await Html.RenderComponentAsync<App>(RenderMode.Server))
</app>

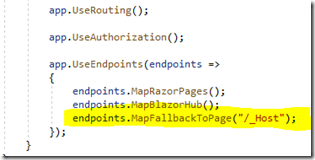
Startup.cs:

And last, a small addition to Startup.cs’ Configure-method. We previously added MapBlazorHub but now we also add call to MapFallbackToPage and point it to the new _Host.cshtml:

image

And that’s it! Now we just need to test our setup. Add Blazor page Counter into your layout by editing Pages/Shared/_Layout.cshtml:

image

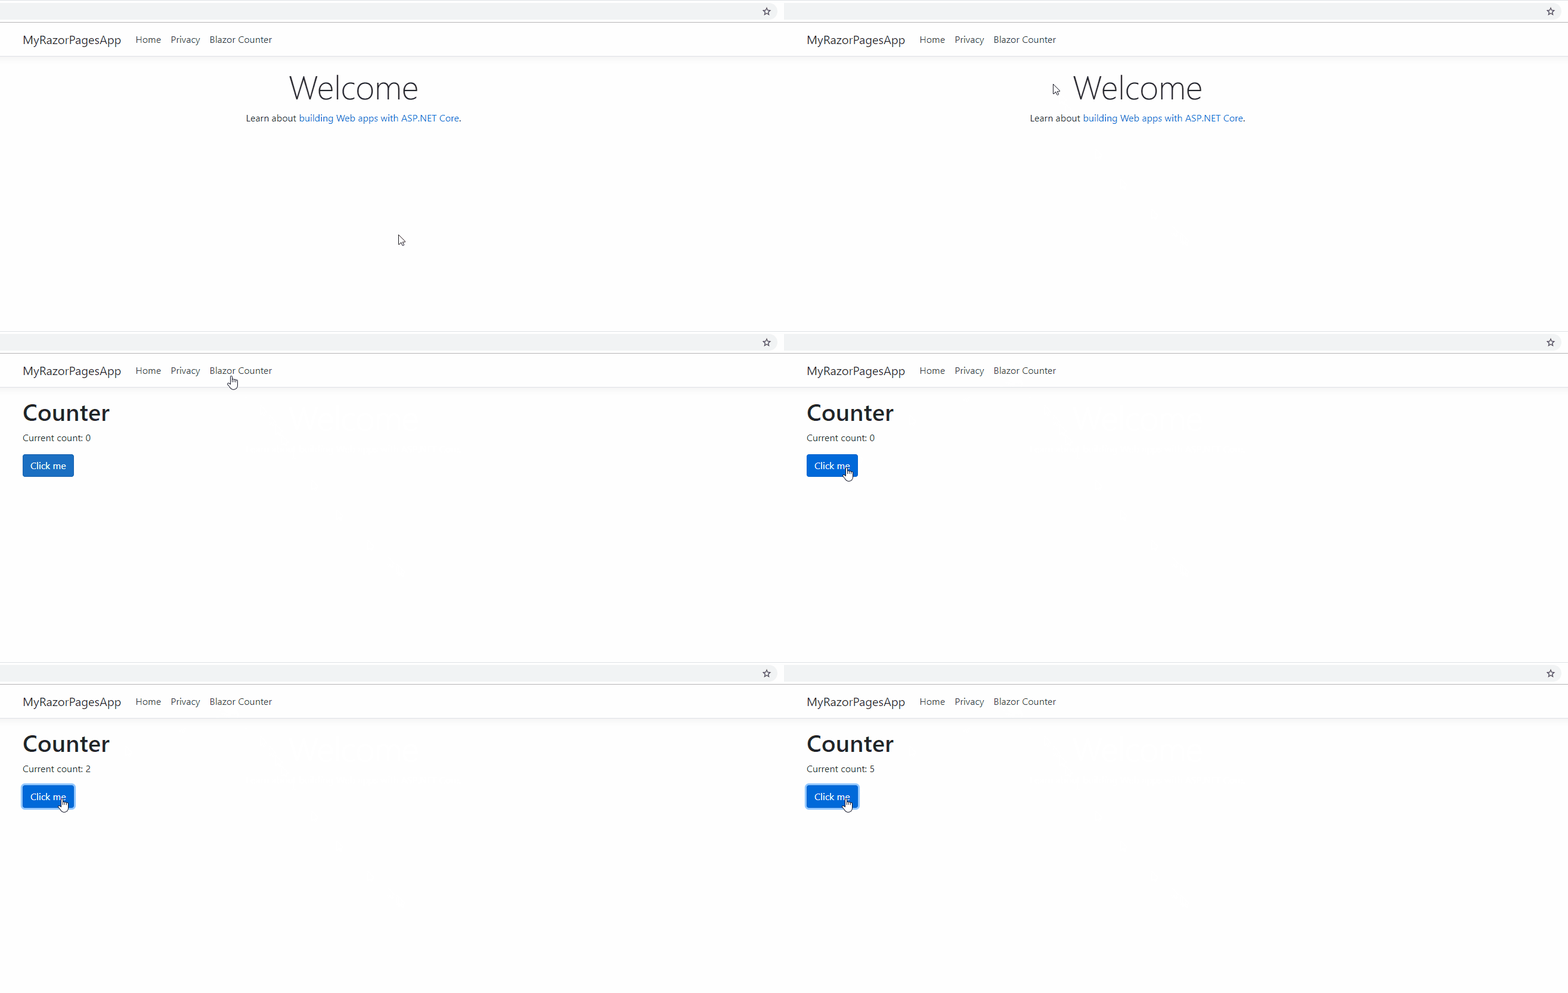
When we now start out application, we should have a working Blazor page in our Razor Pages application:

b8af1ec4-9549-4489-a15f-0b62e11ae2a7

And we didn’t break the support for adding Blazor components into Razor Pages:

32d51f27-44ec-4fa8-8801-3dc8692e3ae7

Notes

There’s couple things to note:

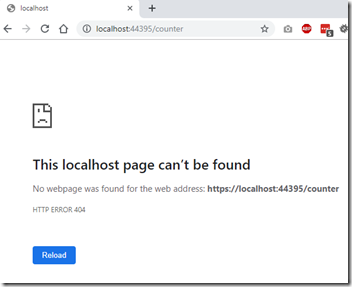
  • Blazor routes only work when they point into root. If “/counter” is changed to for example “/products/counter”, the page can’t load the required blazor.server.js. Instead it gives 404. It should be possible to modify the script-tag so that it can load the required script no matter the location but this seems to have changed from Preview 8 to Preview 9 and I couldn’t get it to work. Here’s a screenshot of the 404 showing the problem:

image

  • If you get the script to load, you probably encounter the same issues with the Blazor hub: The scripts tries to find the hub from /products/blazor instead of blazor. To get around this, you can manually start the connection between the server and the browser:
  • <script src="~/_framework/blazor.server.js" autostart="false"></script>
    <script>
      Blazor.start({
        configureSignalR: function (builder) {
          builder.withUrl('/_blazor');
        }
      });
    </script>

Sample code

Sample code for this project is available from GitHub: https://github.com/mikoskinen/blog/tree/master/blazor-pages-razor-pages-single-app

New week and new .NET Core 3.0 preview means a new 1.3 version of Blazor.EventAggregator. For those who are not familiar with the project, Blazor.EventAggregator is a lightweight Event Aggregator for Blazor. Event aggregator is used for indirect component to component communication. In event aggregator pattern you have message/event publishers and subscribers. In the case of Blazor, component can publish its events and other component(s) can react to those events.

You can find more information about the project from the introduction post or from the project site.

0 Comments

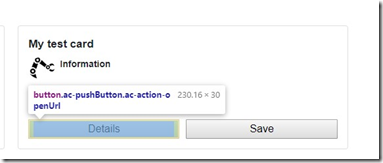
When Adaptive Cards for .NET is used to render a HTML card, the card renderer automatically adds few classes into the actions. Here’s an example where an adaptive card is rendered in ASP.NET Core using the defaults:

image

We can see that the actions automatically get classes like ac-pushButton and ac-action-openUrl. CSS can be used to customize these classes. But if you’re using something like Bootstrap, it’s quite likely that you want to use classes like btn and btn-primary. This post shows how to use Bootstrap’s btn-classes with Adaptive Cards’ HTML renderer in ASP.NET Core.

Modifying the HTML renderer

You can modify the adaptive cards’ HTML renderer to inject the classes you like. The modifications happen through AdaptiveCardRenderer.ActionTransformers.Register. The modifications can be registered for example in the Configure-method of the application:

        // This method gets called by the runtime. Use this method to add services to the container.
        public void ConfigureServices(IServiceCollection services)
        {
            services.AddLocalization();
            services.AddDistributedMemoryCache();
            services.AddSession(options => { options.IdleTimeout = TimeSpan.FromMinutes(20); });

            AdaptiveCardRenderer.ActionTransformers.Register<AdaptiveOpenUrlAction>((action, tag, context) =>
            {
                tag.AddClass("btn");
                tag.AddClass("btn-primary");
            });

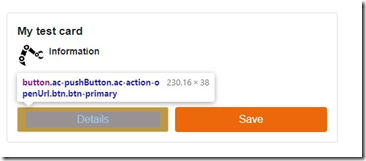
The example above adds “btn” and “btn-primary” classes into each OpenUrl action:

image

Conditional classes

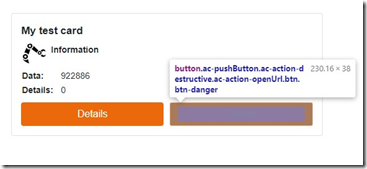
Classes can be added conditionally, based on the card’s schema. Here’s an example where action’s style is used to define the applied CSS classes:

            AdaptiveCardRenderer.ActionTransformers.Register<AdaptiveOpenUrlAction>((action, tag, context) =>
            {
                tag.AddClass("btn");

                if (string.Equals(action.Style, "destructive", StringComparison.InvariantCultureIgnoreCase))
                {
                    tag.AddClass("btn-danger");
                }
                else
                {
                    tag.AddClass("btn-primary");
                }
            });

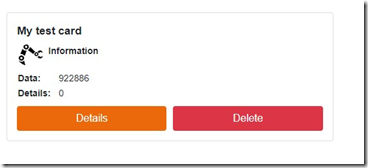
image

As we can see, btn-danger is applied to the button on the right side.

image

Custom attributes

Register-method can be used for more than just adding custom classes. AddAttribute can be used to add new custom attributes to the button:

            AdaptiveCardRenderer.ActionTransformers.Register<AdaptiveOpenUrlAction>((action, tag, context) =>
            {
                tag.Attr("id", AdaptiveCardRenderer.GenerateRandomId());
                tag.Attr("data-ac-url", action.Url);
            });

Note

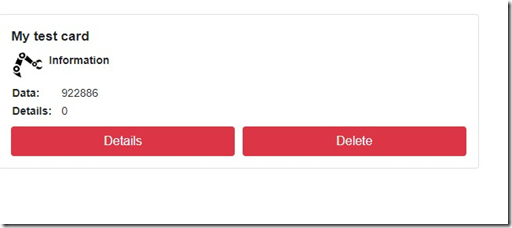
Register-method can be called only once per element type. If you have multiple calls to Register<AdaptiveOpenUrl>, the last one wins:

        // This method gets called by the runtime. Use this method to add services to the container.
        public void ConfigureServices(IServiceCollection services)
        {
            services.AddLocalization();
            services.AddDistributedMemoryCache();
            services.AddSession(options => { options.IdleTimeout = TimeSpan.FromMinutes(20); });

            AdaptiveCardRenderer.ActionTransformers.Register<AdaptiveOpenUrlAction>((action, tag, context) =>
            {
                tag.AddClass("btn");
                tag.AddClass("btn-primary");
            });
            
            AdaptiveCardRenderer.ActionTransformers.Register<AdaptiveOpenUrlAction>((action, tag, context) =>
            {
                tag.AddClass("btn");
                tag.AddClass("btn-danger");
            });

image